365 Total Protection allows partners to perform the first setup steps in the Control Panel automatically for customers with a Microsoft 365 account.
TABLE OF CONTENTS
- Creating a Customer in the Dashboard
- Setting up of 365 Total Protection Plan
- Configure Spam & Malware Protection
- Configuring PPTP SPF & DKIM records
- Deactivating MS Spam Filtering for PPTP IP Ranges
- Adding PPTP MX records (Priority 999) & Domain Verification
- Configuring Advanced Threat Protection
- Configuring Email Encryption
- Enabling Continuity Service
- Turning off any Lockdown Rules (previously Set-up)
- Changing PPTP MX record (Priority 0) & Inbound Email Verification
- Installing Email connectors
Creating a Customer in the Dashboard
PPTP KB Article: Creating a Customer in the Dashboard
Important: In the Scope Selection section, verify that the correct partner is selected before proceeding to create a new customer.
Under Scope Selection, please select the correct scope. For example:
- Test environment: vircom
- Production environment: vircom-us/vircom-direct-us (or -ca/-eu)

STEPS:
- Log in to the Control Panel using your administrative credentials.
- Ensure the correct partner is selected in the Scope Selection.
- Open the Dashboard module.
- Click + Create a Customer

5. The customer creation form will appear at the bottom of the page.

Notes:
Uncheck "Use an existing account administrator"
Under "Synchronization via:" field, Microsoft 365 is recommended
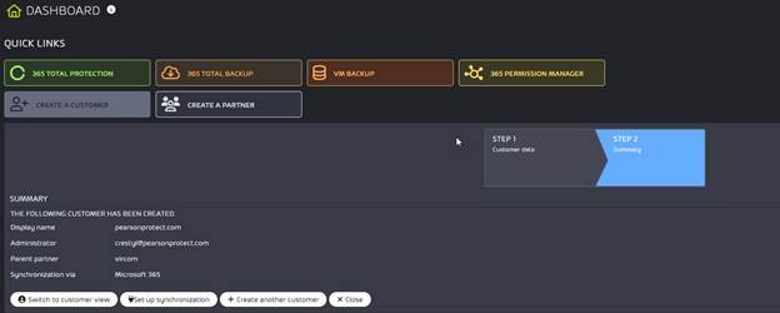
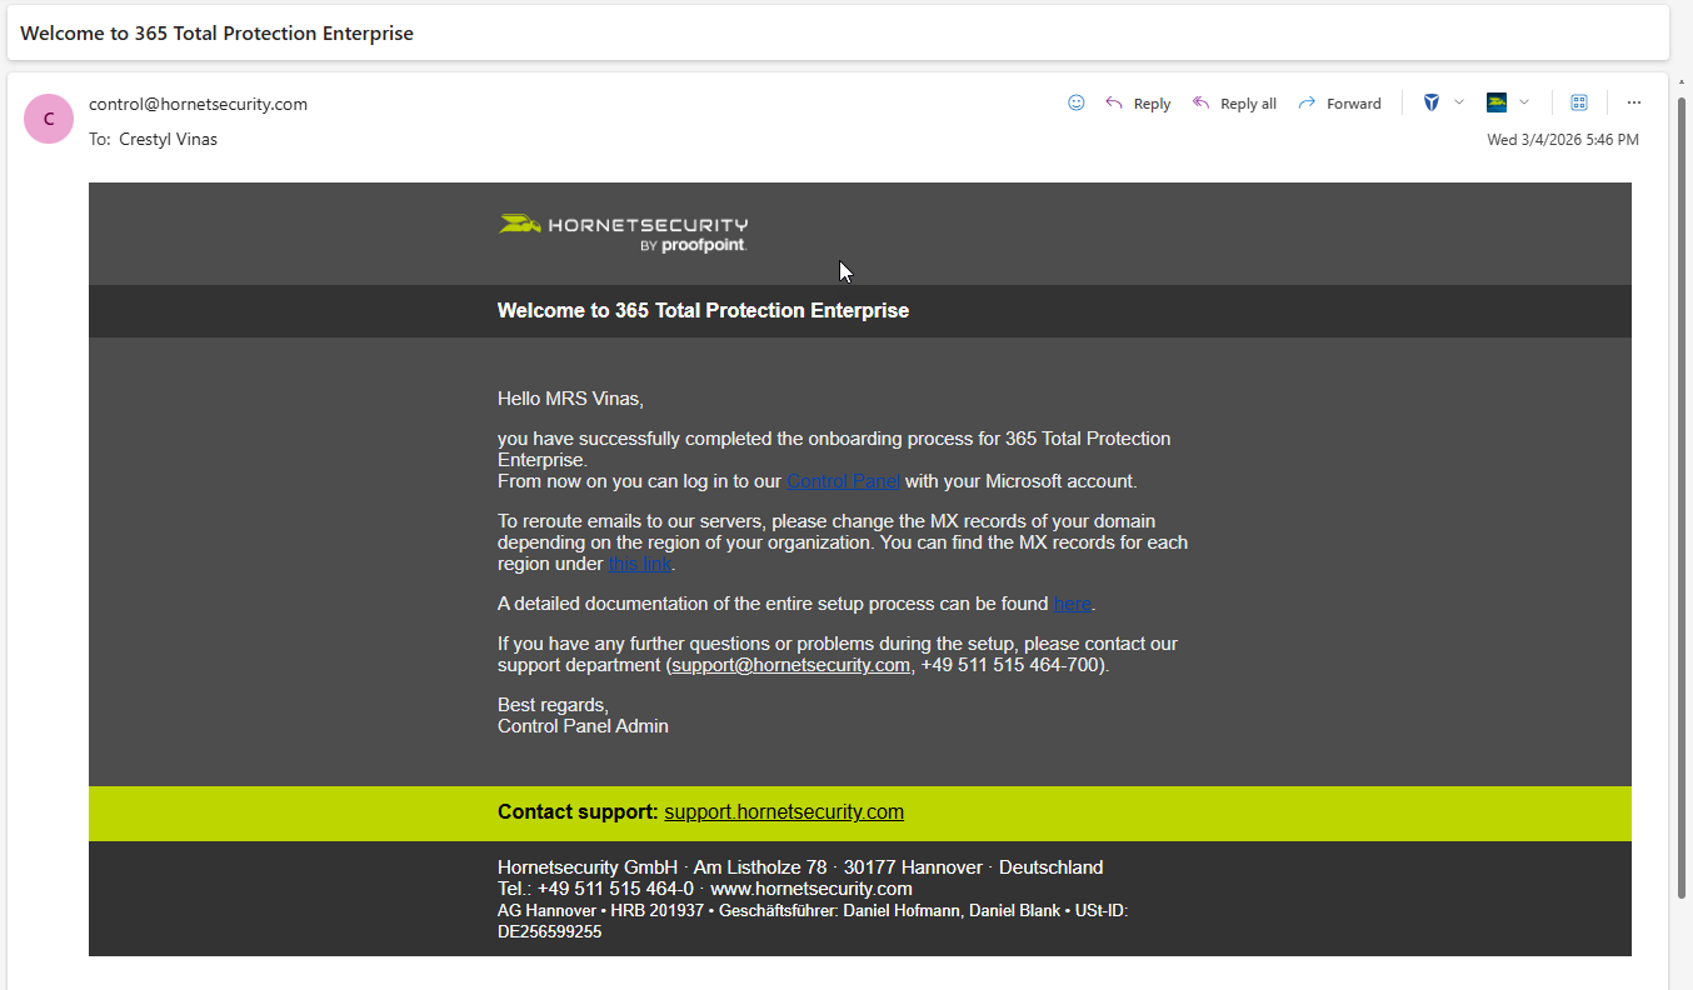
• Once customer account is created, your Admin account will receive an email from control@hornetsecurity.com with Subject :Domain settings for Control Panel activation
• Customer will not receive a Welcome email , so we will ask them to reset their password during the onboarding session.
Setting up of 365 Total Protection Plan
PPTP KB Articles:
Opening the Onboarding Form for 365 Total Protection
Synchronizing 365 Total Protection with a Microsoft 365 Organization as a Customer
STEPS:
- Log in to the Control Panel using your administrative credentials.
- Ensure the correct account is selected in the Scope Selection.
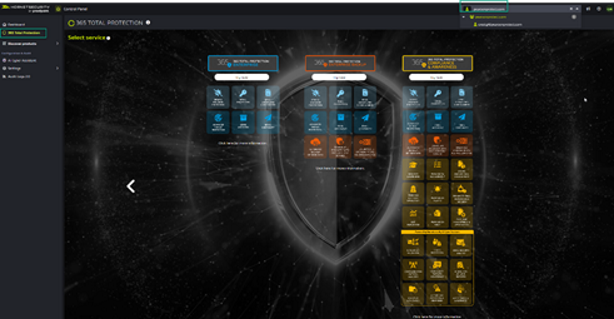
- Navigate to 365 Total Protection > 365 Total Protection.
- Select a 365 Total Protection version for the new customer.
- Click on “Try now” under the desired version
Essentials and 365 Total Protection Plan Comparison:

Essentials and Hornet Package Comparison - Proofpoint Total
 Protection
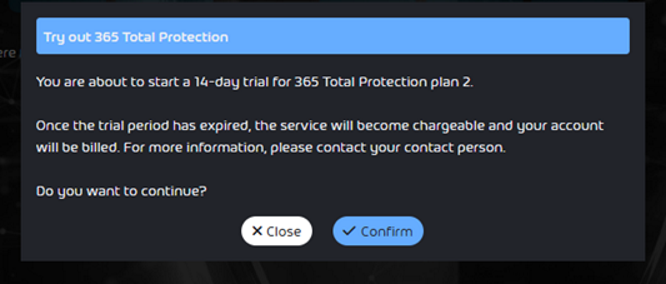
6. In order to enable 365 Total Protection, click on Confirm
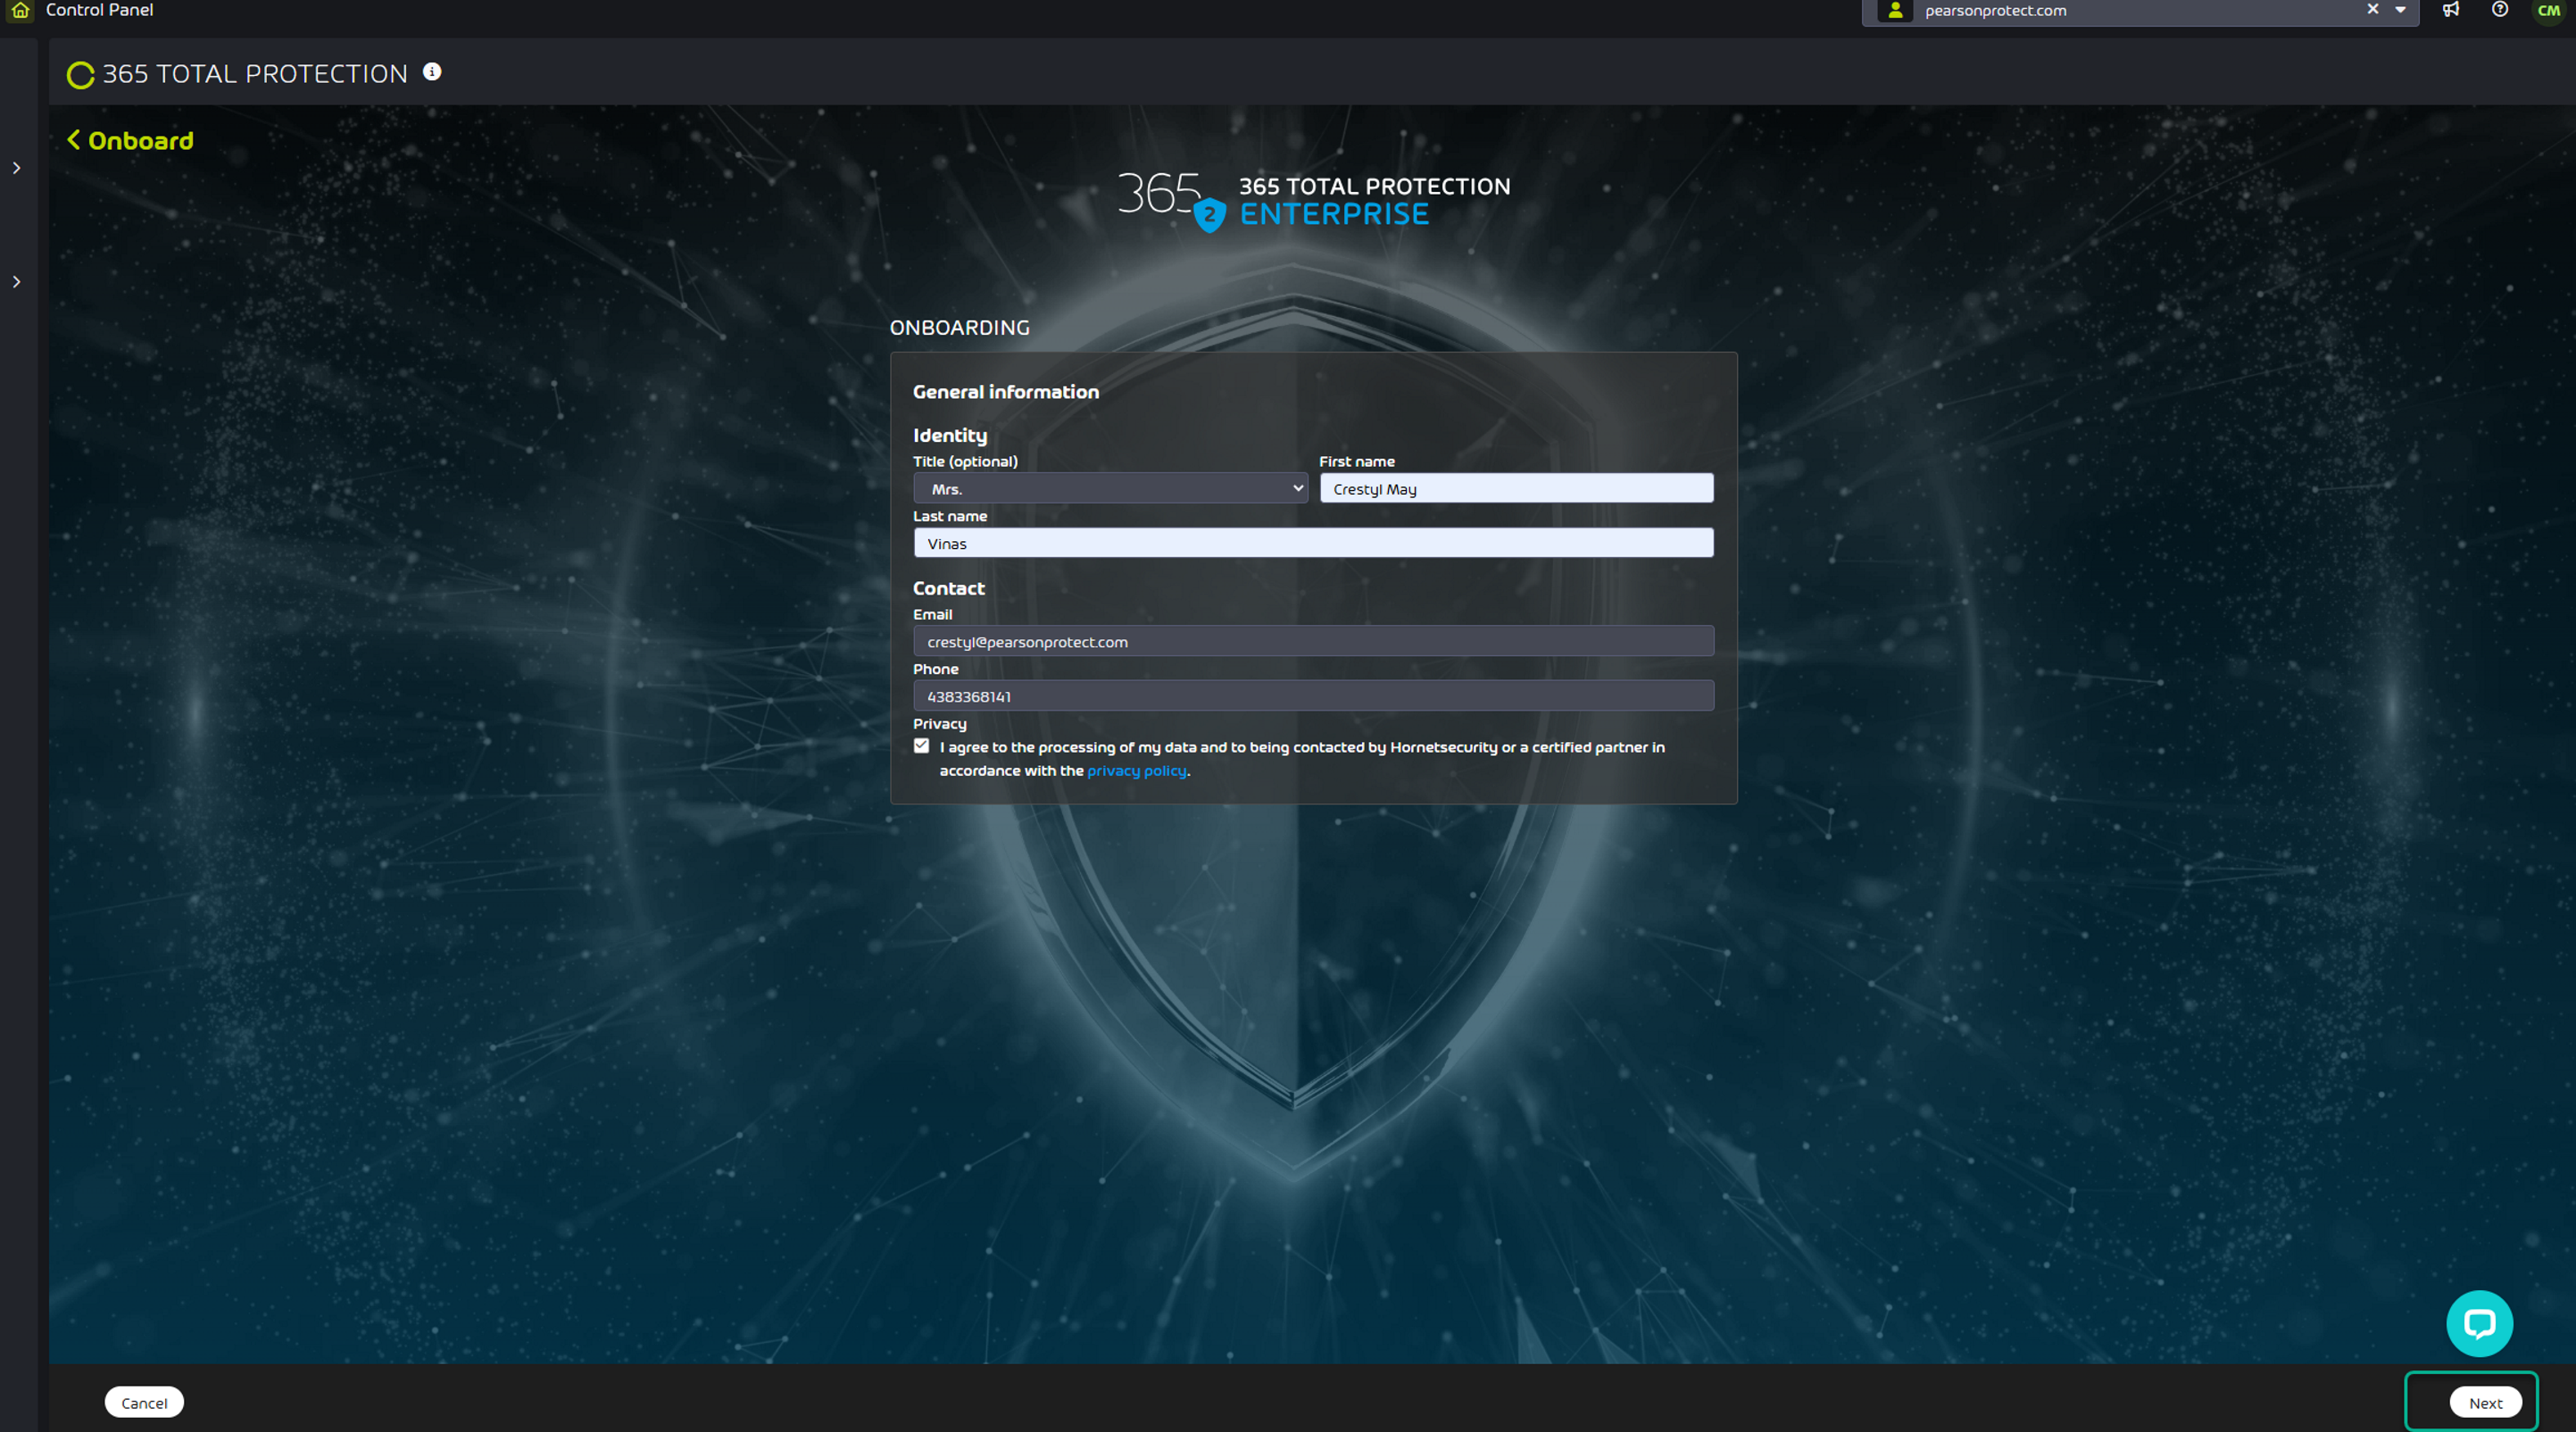
7. Enter your contact data in the fields Company name, Title, First name, Last name, Email and Phone of the onboarding form. Click on next
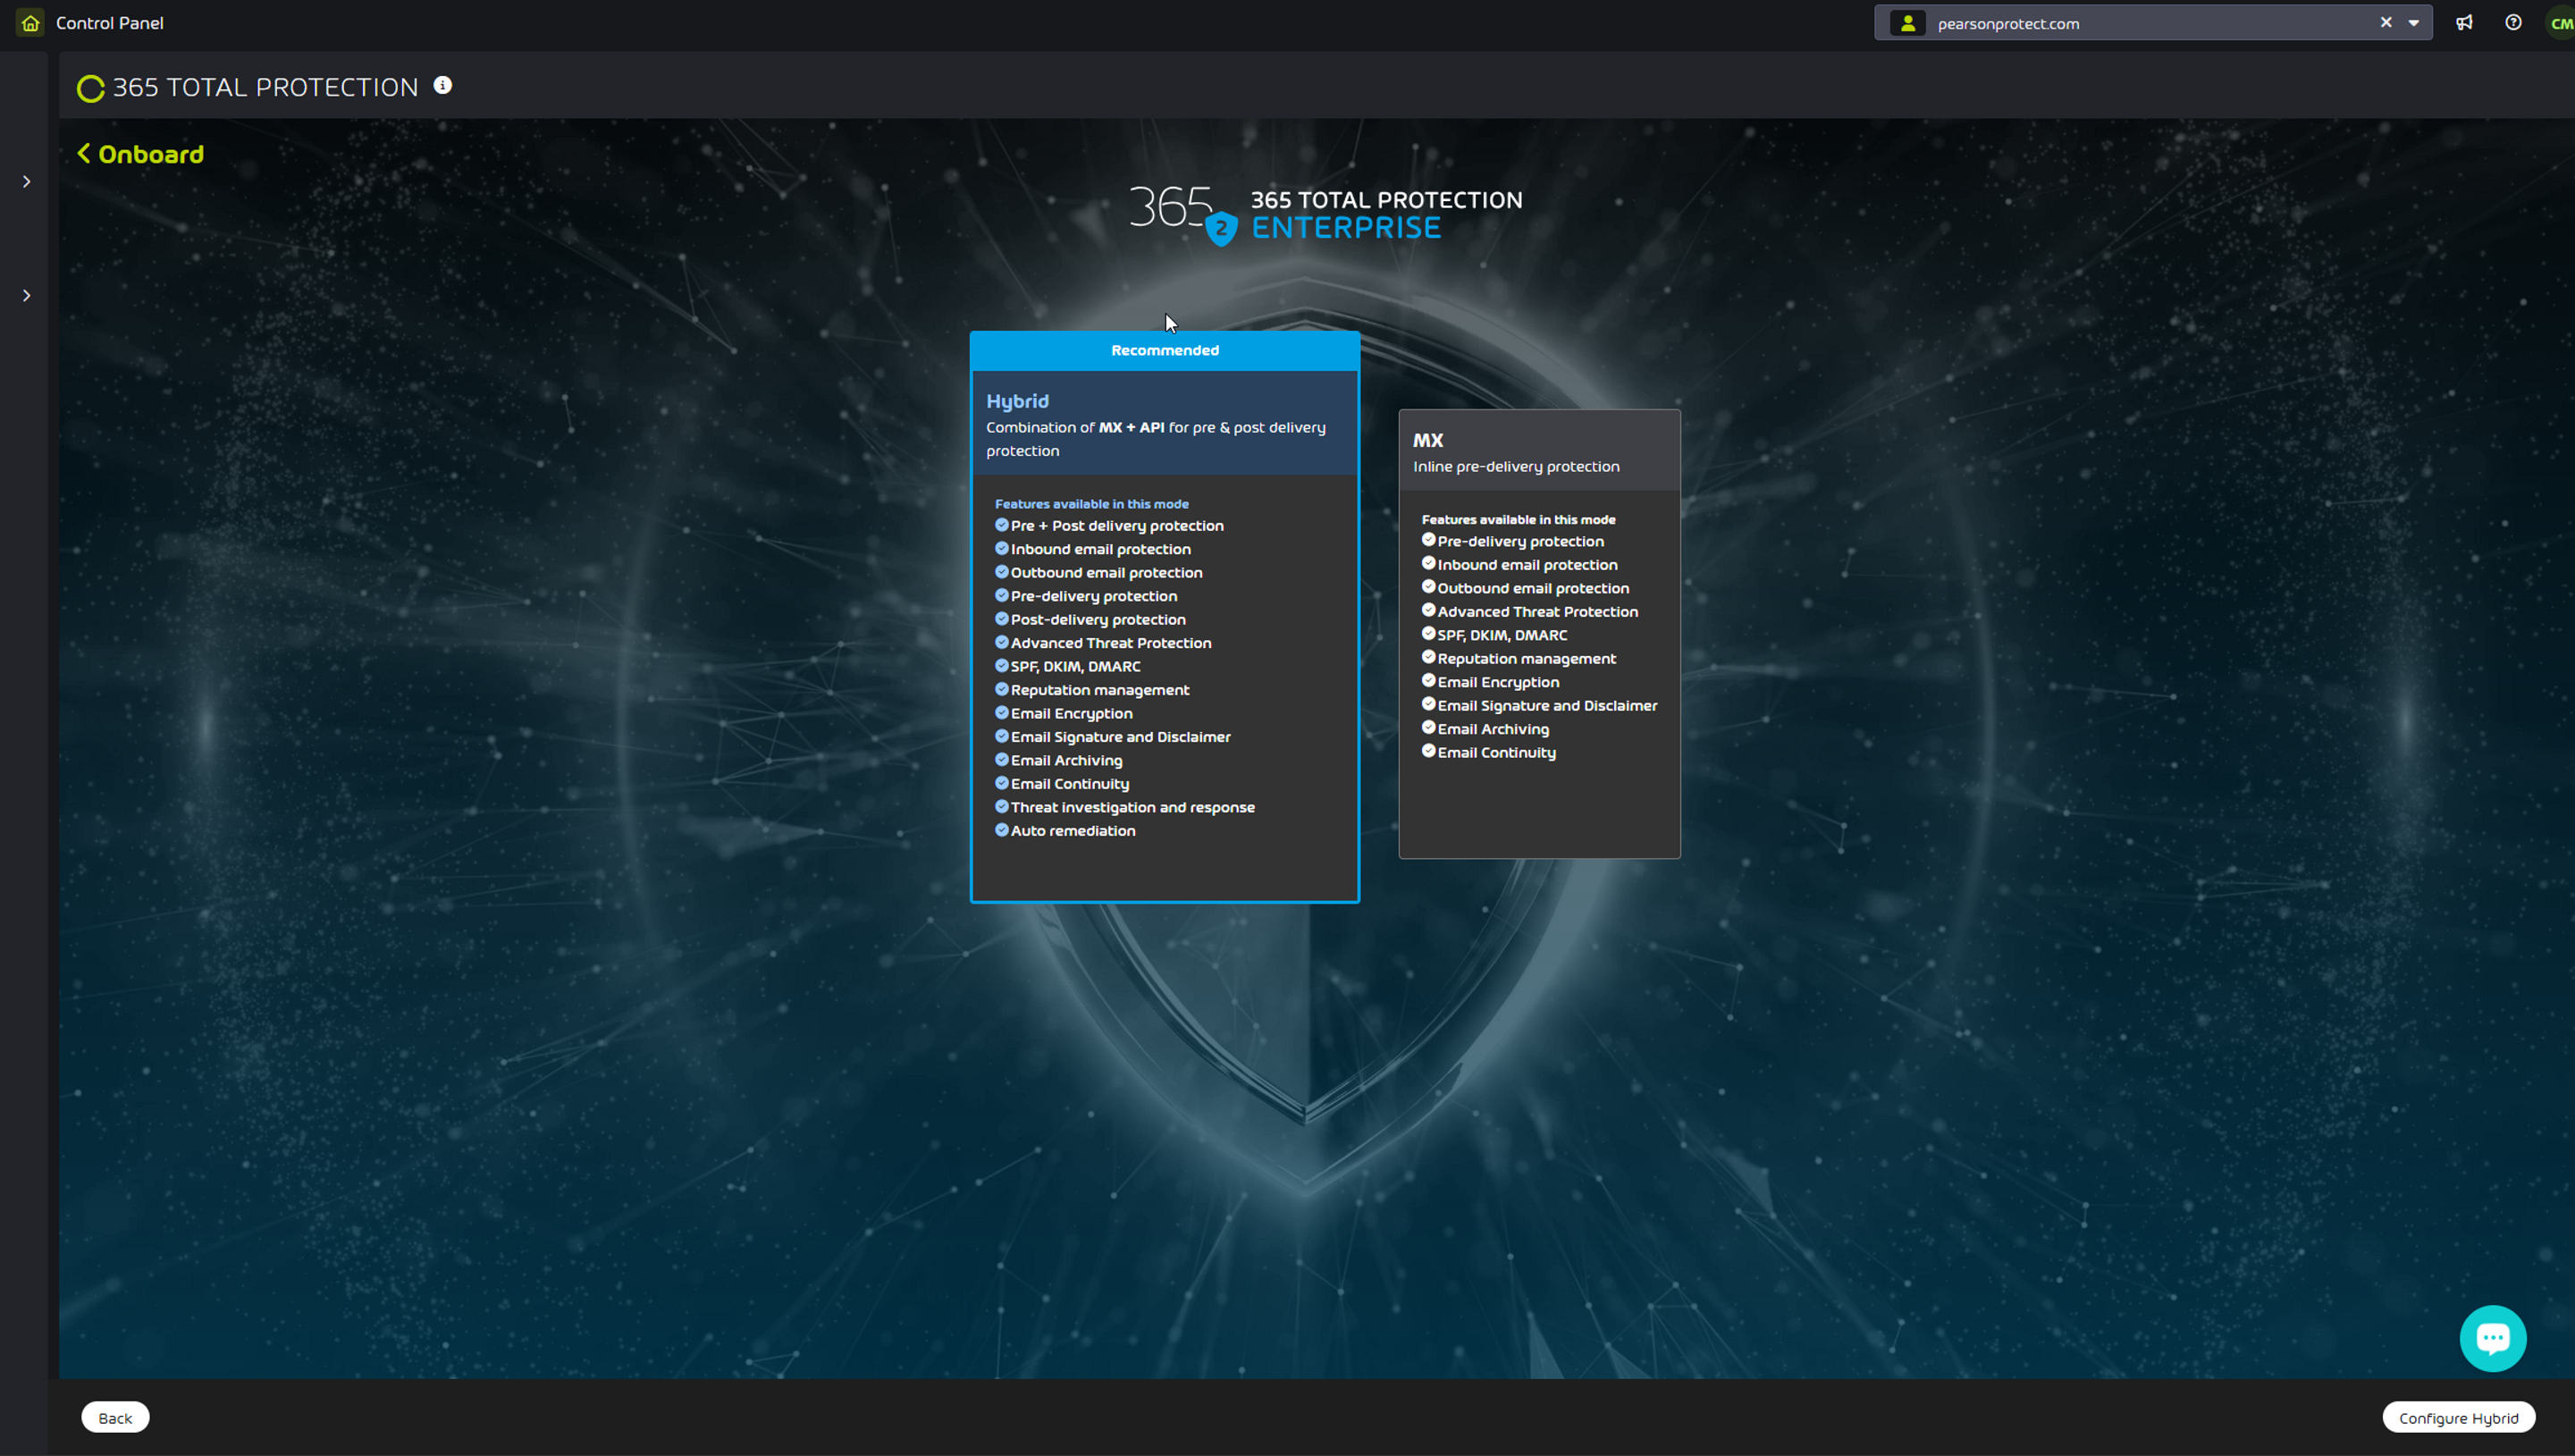
8. From the Onboarding mode page, select one of the following onboarding modes:
MX, then select Configure MX
Hybrid, then select Configure Hybrid (Recommended)
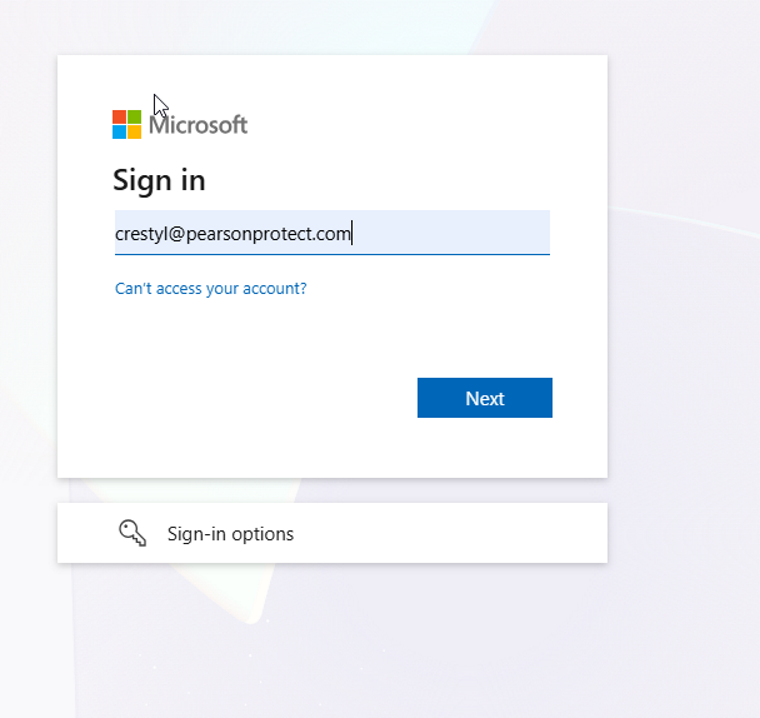
9. The Microsoft login page is displayed. Log in to Microsoft 365 with your administrative credentials.
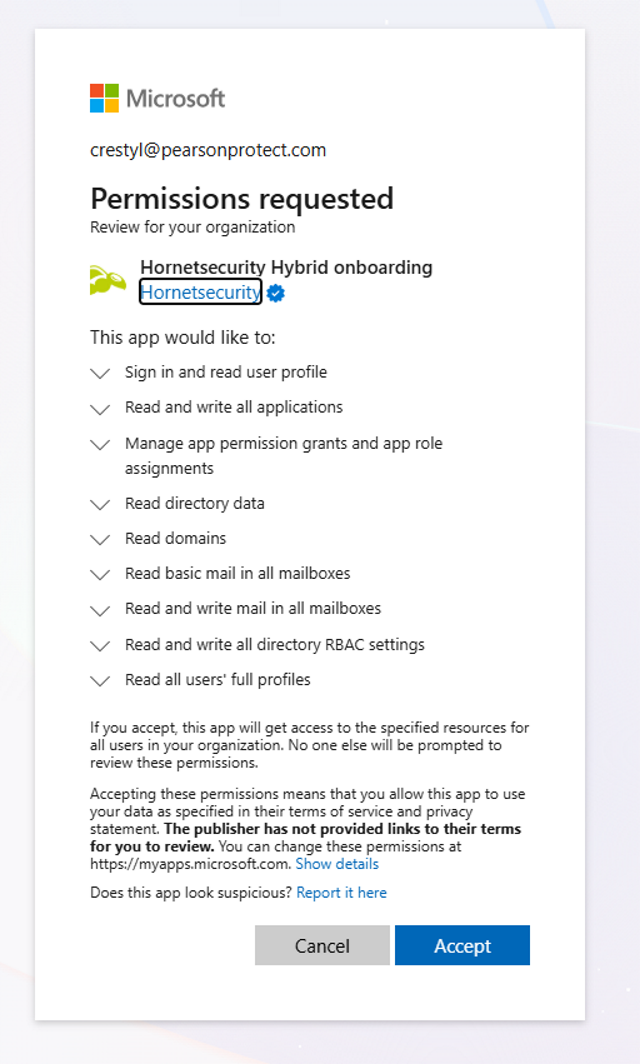
10. Accept the requested permissions to connect PPTP services to Microsoft.
11. The customer's domains and mailboxes will be created in the Control Panel.
The default configuration of 365 Total Protection is applied to the customer
 (see Default Settings of 365 Total Protection).

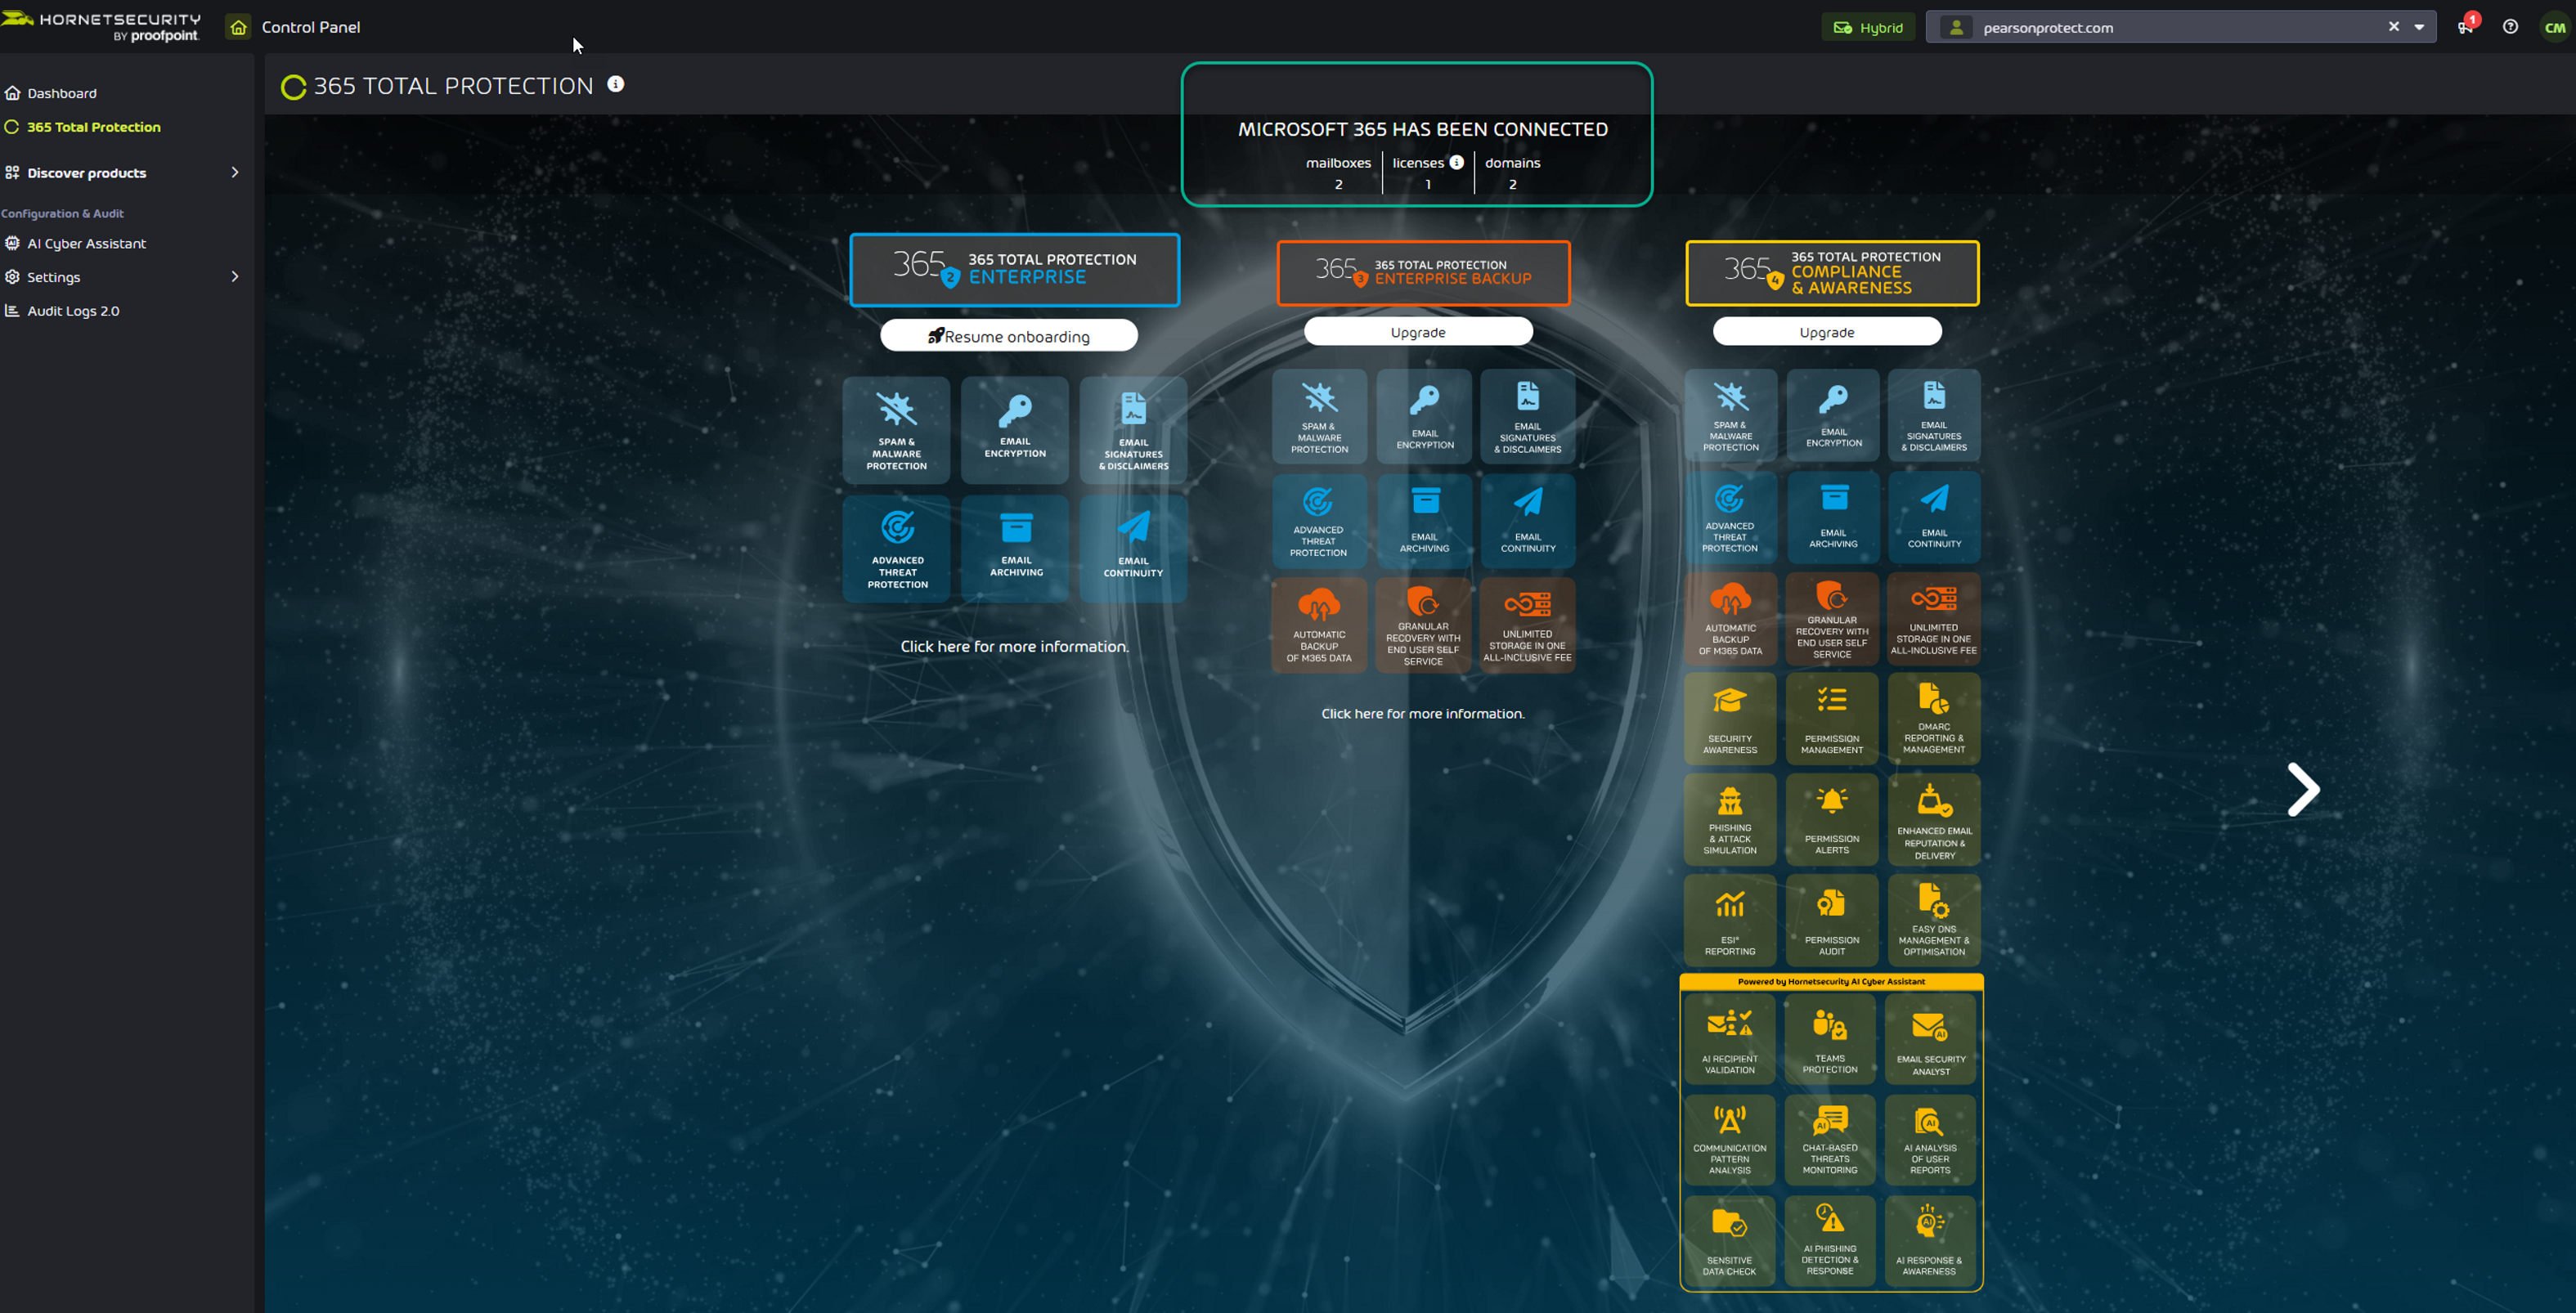
Now, the Global admin will receive a Welcome email:
Instead of using the Onboarding Wizard, we will configure the settings directly within the individual service modules in the Control Panel.

Please wait a couple of minutes for the 365 PPTP products to appear in the navigation menu, then refresh the page.
Configuring Spam & Malware Protection
PPTP KB Article: About Spam and Malware Protection
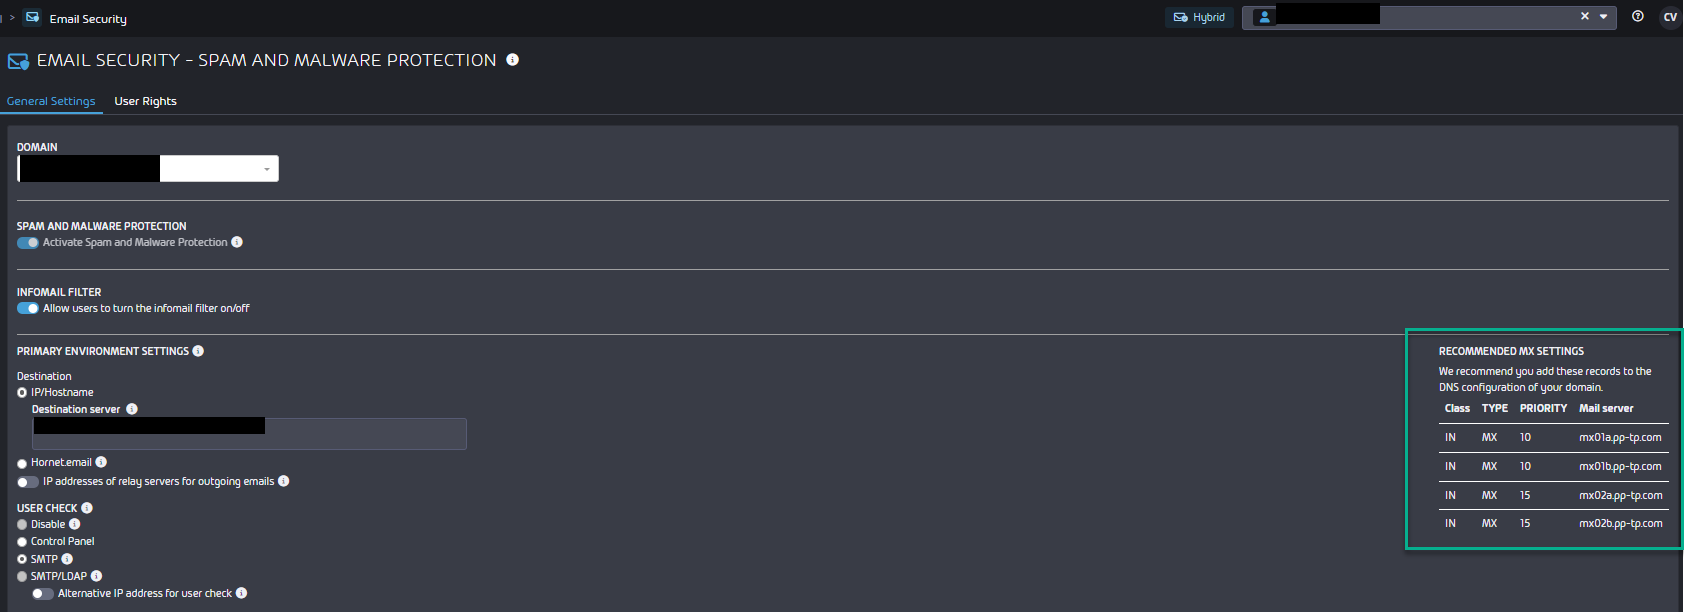
From the Scope selection > Select your Domain > Email Security > Spam & Malware Protection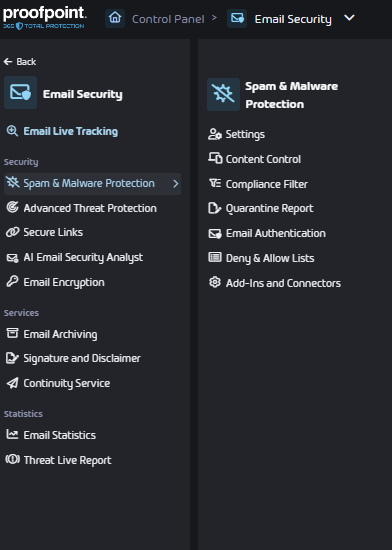
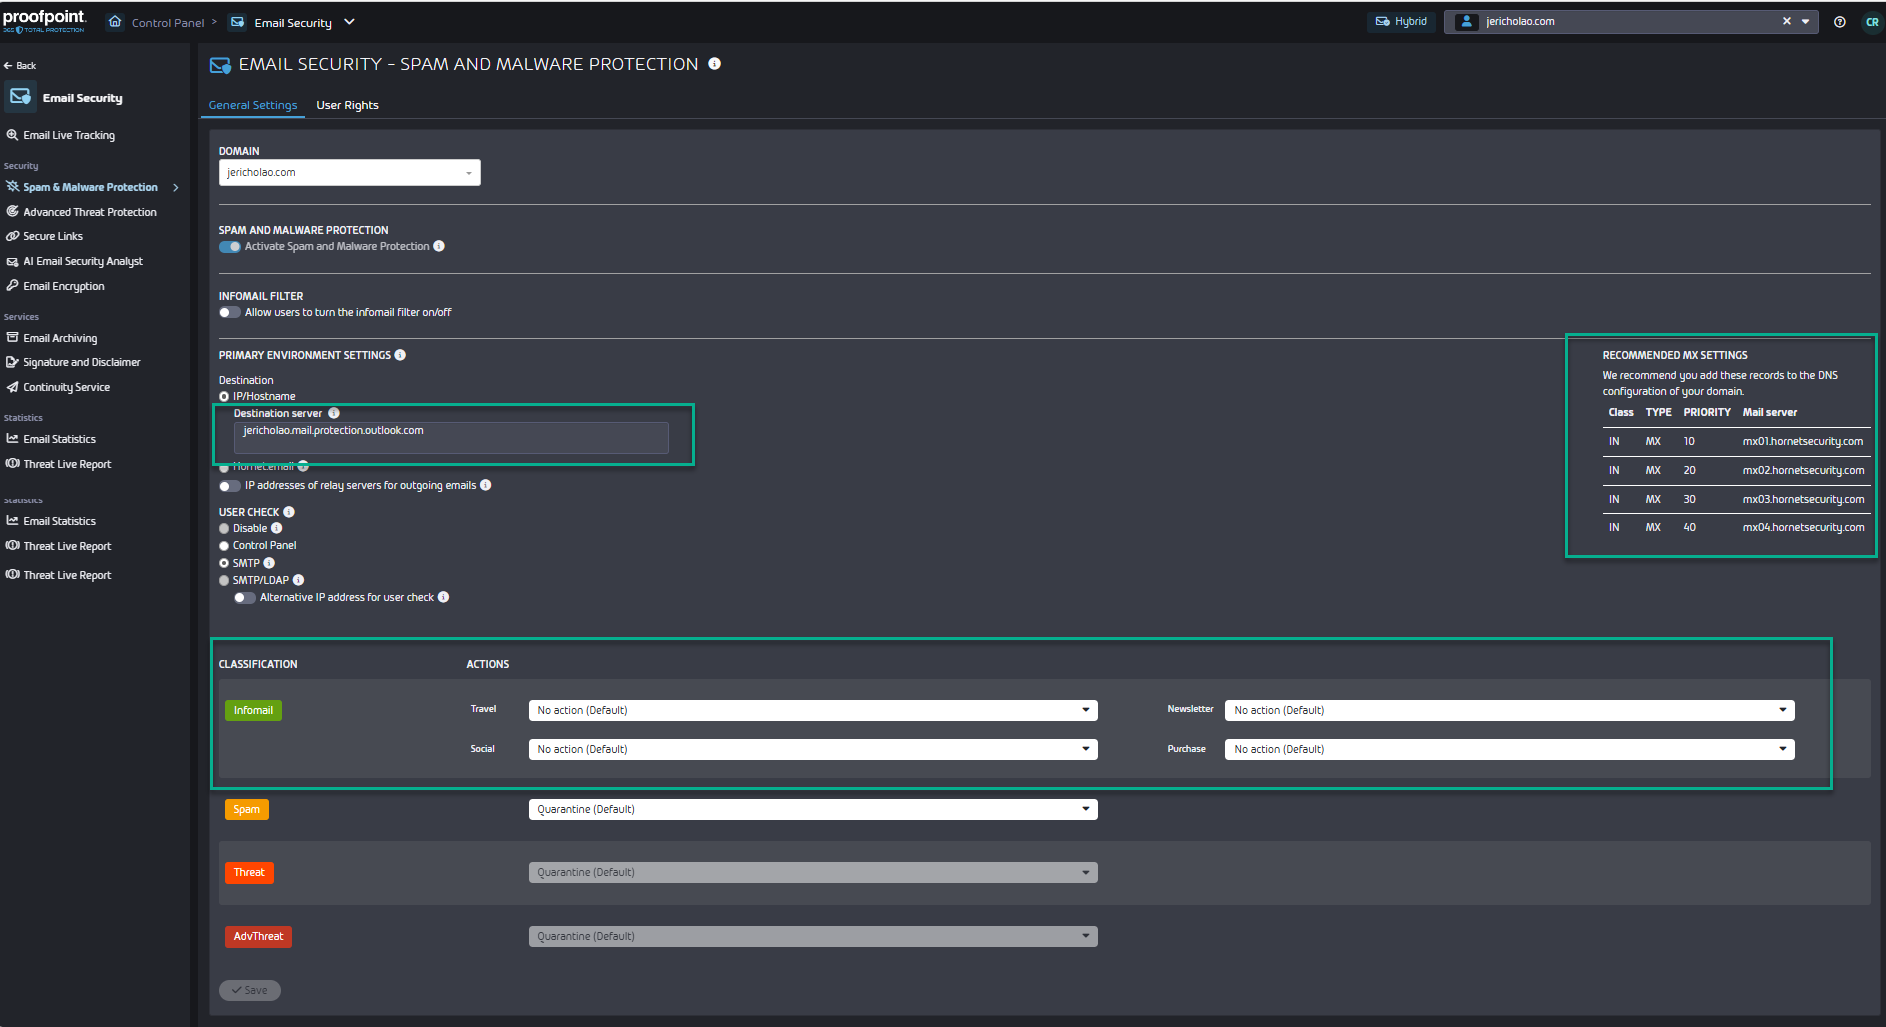
SETTINGS:
In the General Settings tab under Email Security > Spam & Malware Protection > Settings, a field with recommended MX settings is displayed (see Adjusting MX Records).
If you have multiple domains, select the appropriate domain from the domain list and configure the settings individually for each domain.
Recommended Settings:
Destination Server: Prefilled (Leave it as is)
User check: SMTP
Infomail: Quarantine
SETTINGS:
CONTENT CONTROL:
PPTP KB Articles:

Activating Content Control

About Content Control
It's another security layer , to manage the handling of attachments of incoming and outgoing emails.
Recommended Settings:
Groups: This is where you can configure and manage Groups.Max Email Size: We recommend setting the maximum email size to 150 MB.Handling of Filtered out Attachments: Store emails in quarantineFilters: Administrators can choose which attachment types shall be filtered out.When making changes on this page, please allow up to 30 minutes for them to take effect.
SETTIGS: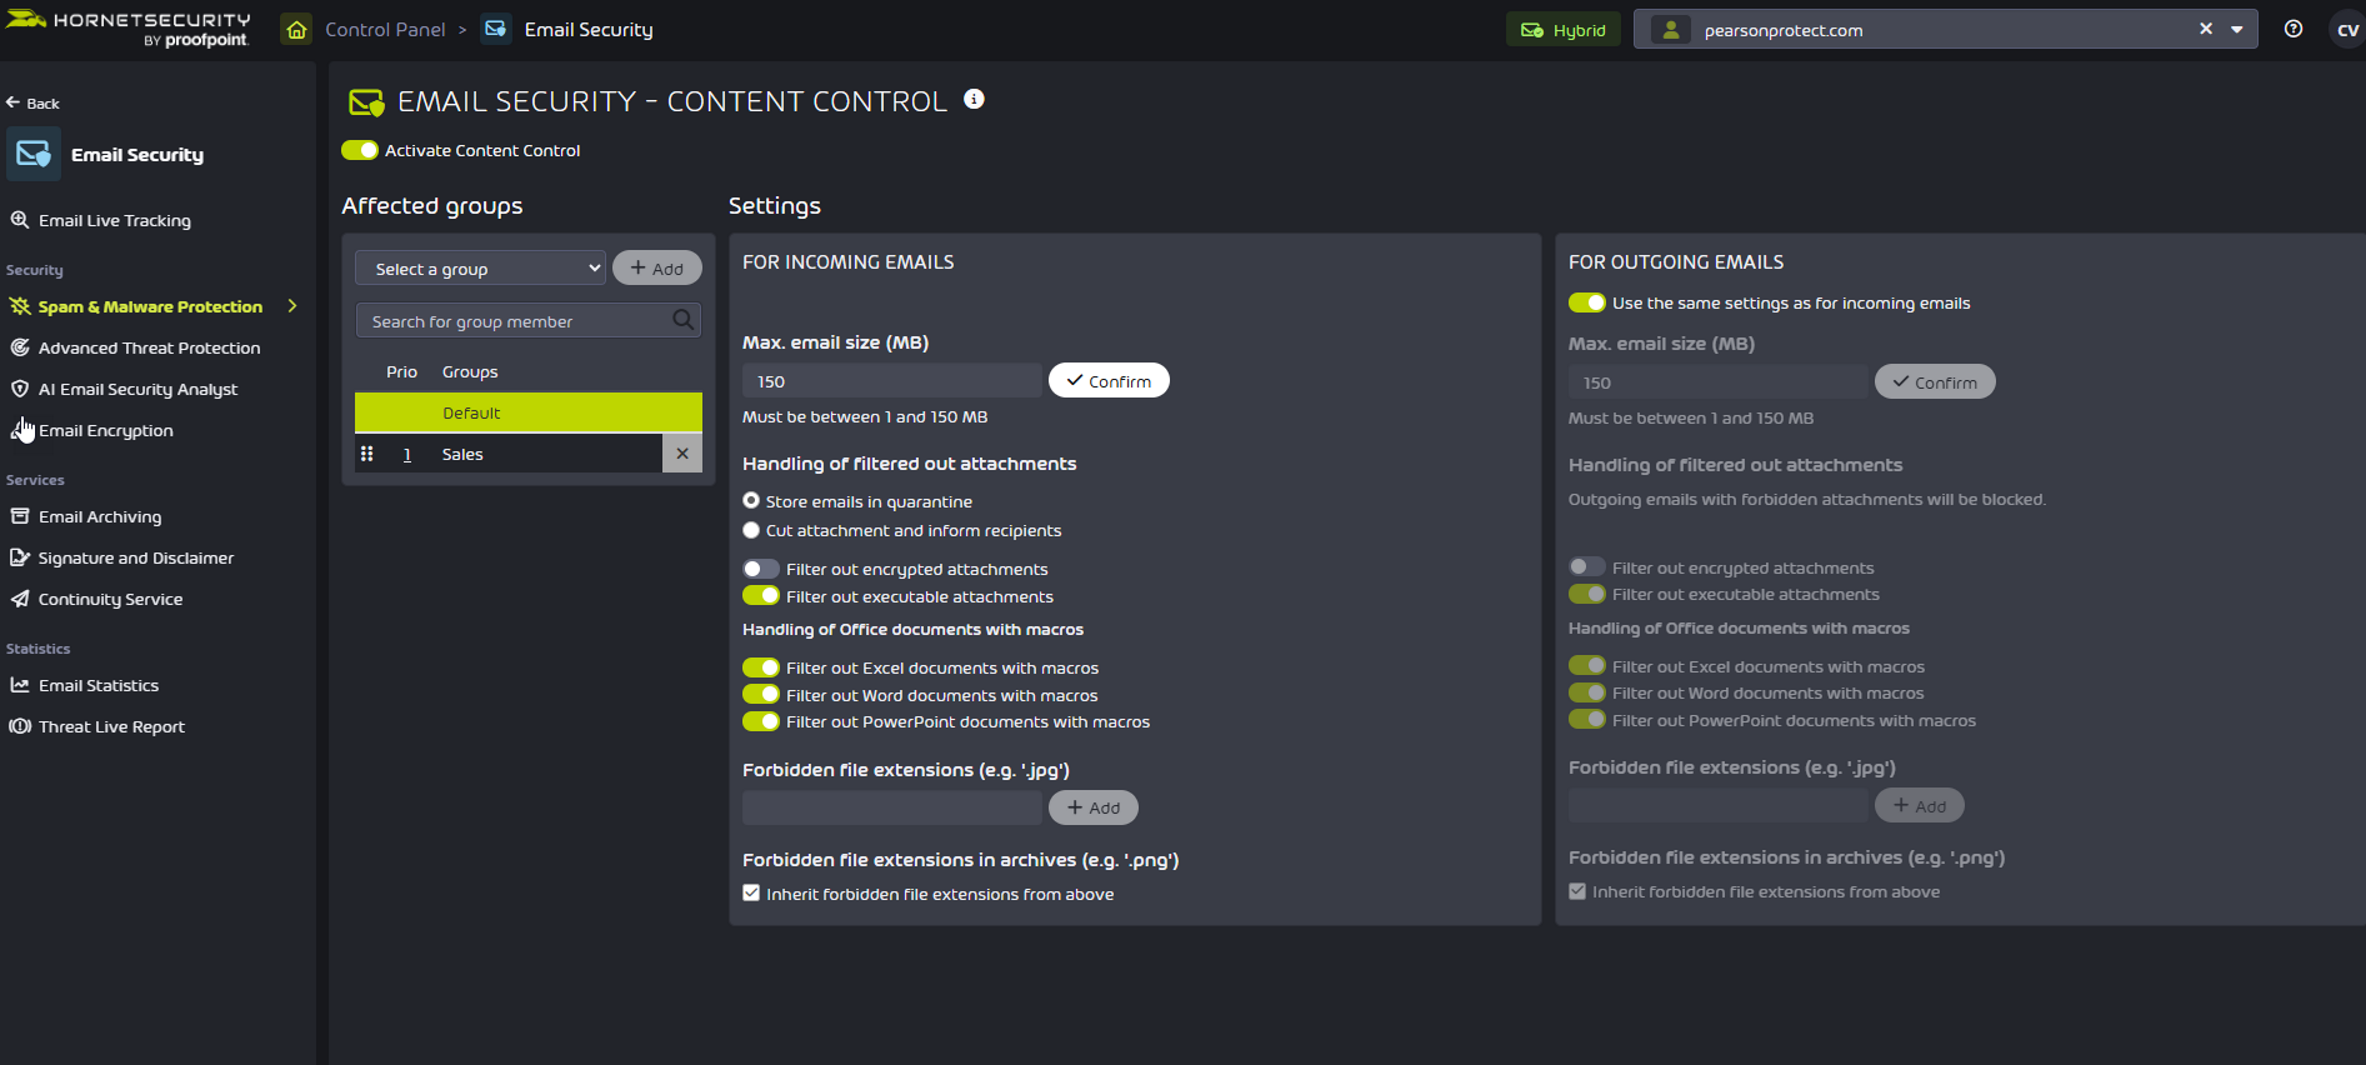
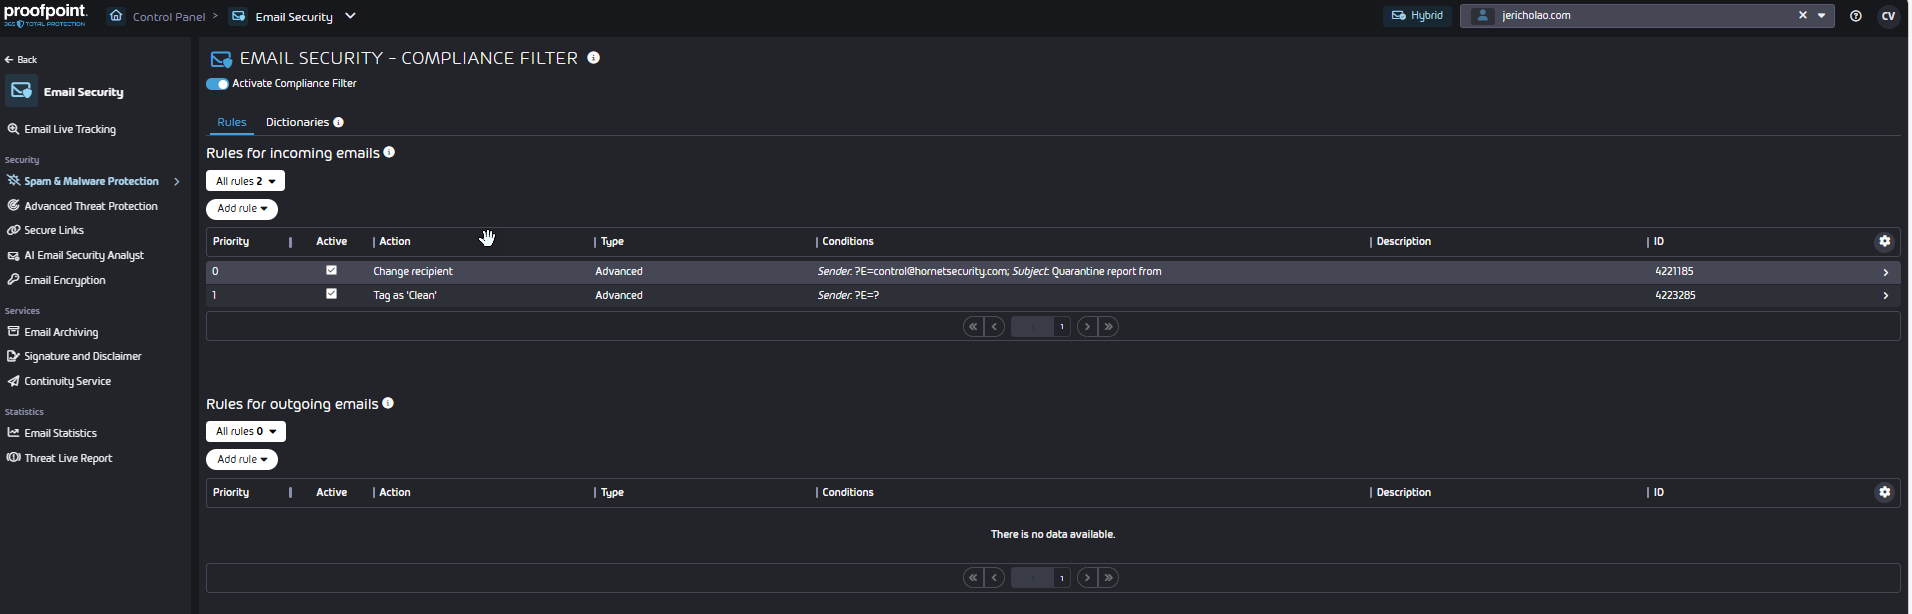
COMPLIANCE FILTER:
PPTP KB Article:
About the Compliance Filter
Activating Compliance Filter
No need to add compliance filter during the set-up but feel free to Add : Filter Rules
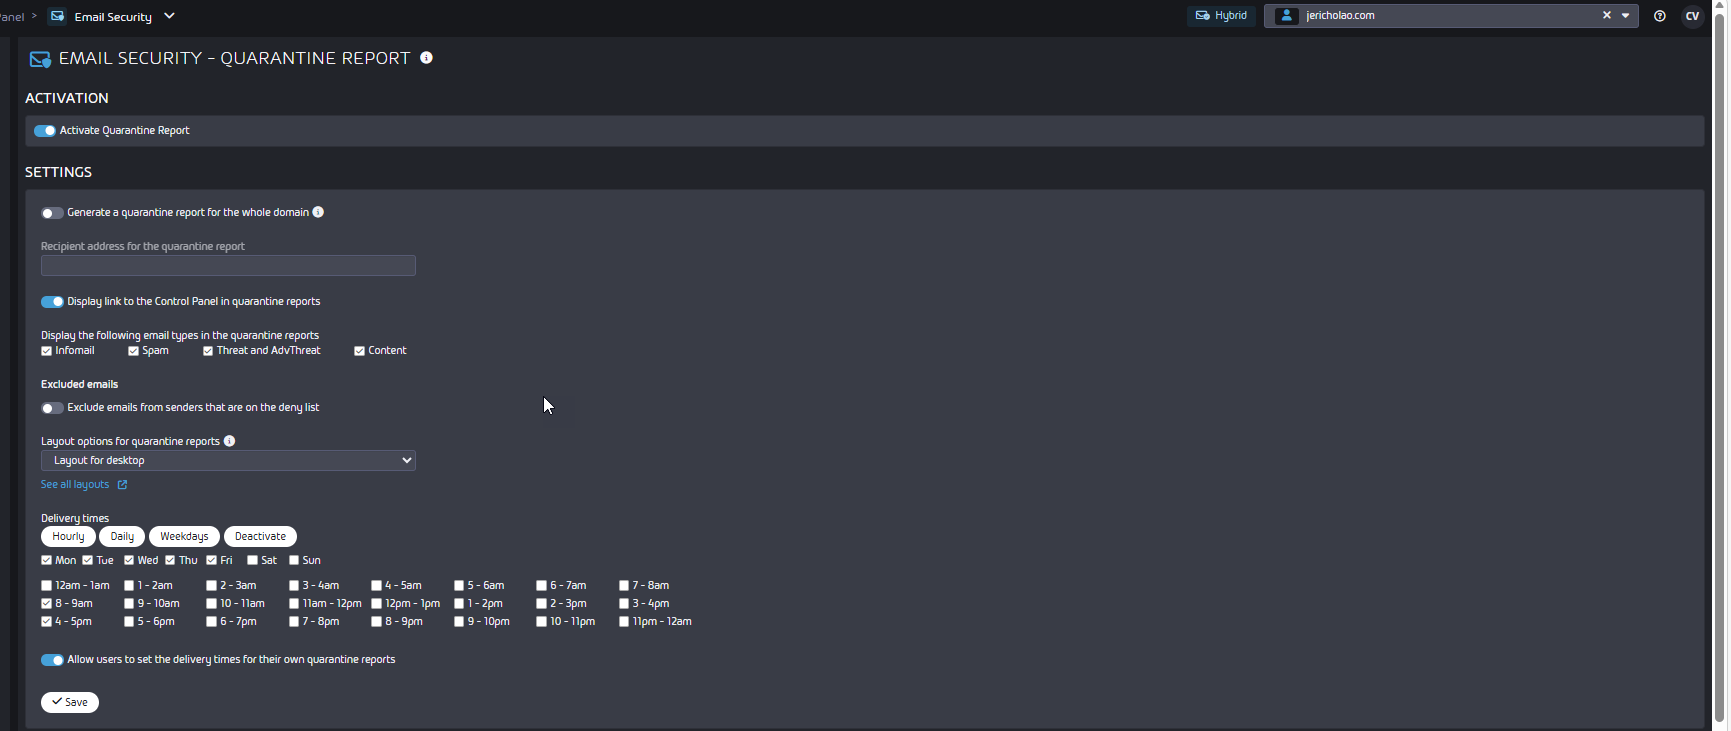
QUARANTINE REPORT:
PPTP KB Article: About Quarantine Report
This is turned on by default
Doesn't send empty reports, will send only new ones
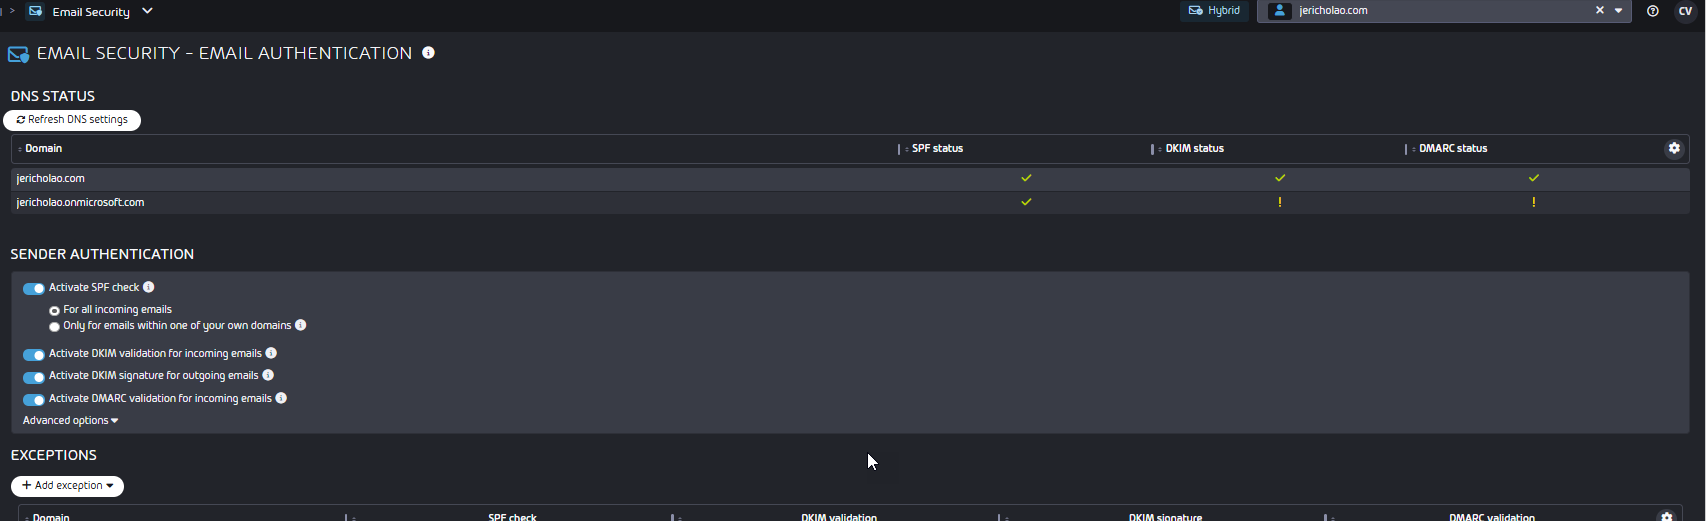
EMAIL AUTHENTICATION:
PPTP KB Article: About Email Authentication
Sender Authentication: It is recommended to enable this setting.
	DKIM signature for Outgoing Emails: This can be enabled after the DKIM keys have been properly
 configured. >
	Setting a CNAME Record
	Advanced Options: Provides more granular controls, similar to anti-spoofing policies PPE
	>Configuring Advanced Options for DKIM Validation
DENY & ALLOW LISTS:
PPTP KB Article: About Deny & Allow Lists
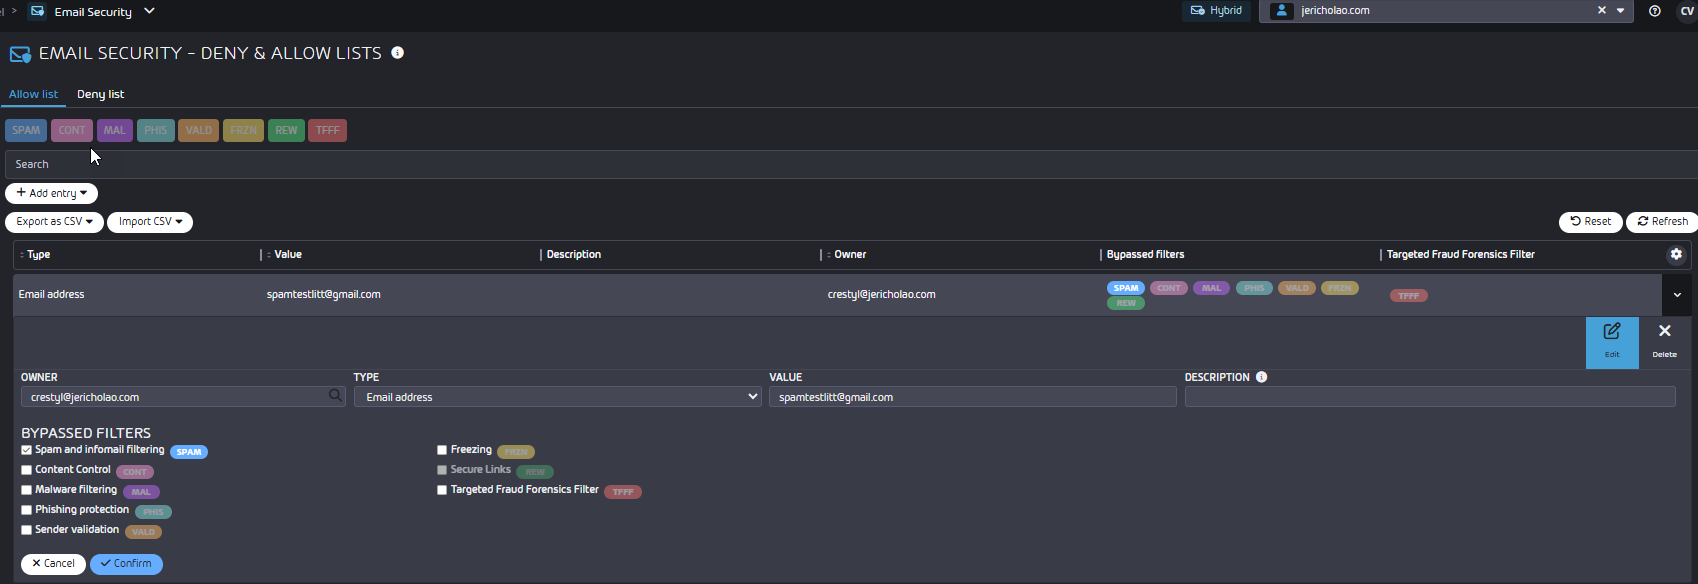
Add Vircom Allow List Entries in PPTP
From Email Security > Spam & Malware Protection > Deny & Allow Lists
Steps:
- Go to Email Security.
- Open Spam & Malware Protection.
- Select Allow & Deny List.
- Click the Allow list tab.
- Click Add entry.
- Add the following entries:
Type Value Description Bypassed Filters Domain vircom.comVIRCOM DOMAIN Spam, Content IP address or range 69.172.217.0/24VIRCOM IP RANGE Spam, Content
- Save the entries.
- Confirm both entries appear in the Allow list with SPAM and CONT shown under Bypassed Filters.

OUTLOOK ADD-INS & CONNECTORS:
Email Connectors: These will be installed later during the setup process.
Outlook Add-in: You may now proceed with installing the Outlook Add-in.

Configuring PPTP SPF & DKIM records
PPTP KB Articles:
Onboarding Information North America - Proofpoint Total Protection
Setting an SPF Record with 365 Total Protection (Not yet updated)
Setting a CNAME Record
PPTP SPF Records:
“v=spf1 include:spf.pp-tp.com ~all”
PPTP DKIM Records:
s1._domainkey.DOMAIN.TLD CNAME s1._domainkey.pp-tp.com
s2._domainkey.DOMAIN.TLD CNAME s2._domainkey.pp-tp.com
If they’re using RS OnDMARC, configure SPF & DKIM through RS.
Add Vircom Allow List Entries in PPTP
From Email Security > Spam & Malware Protection > Deny & Allow Lists
Steps:
- Go to Email Security.
- Open Spam & Malware Protection.
- Select Allow & Deny List.
- Click the Allow list tab.
- Click Add entry.
- Add the following entries:
| Type | Value | Description | Bypassed Filters |
|---|---|---|---|
| Domain | vircom.com | VIRCOM DOMAIN | Spam, Content |
| IP address or range | 69.172.217.0/24 | VIRCOM IP RANGE | Spam, Content |
- Save the entries.
- Confirm both entries appear in the Allow list with SPAM and CONT shown under Bypassed Filters.
Setting an SPF Record with 365 Total Protection (Not yet updated) Setting a CNAME Record
Deactivating MS Spam Filtering for PPTP IP Ranges
PPTP KB Article: Deactivating the Microsoft 365 Spam Filter for the IP Address Range of Hornetsecurity
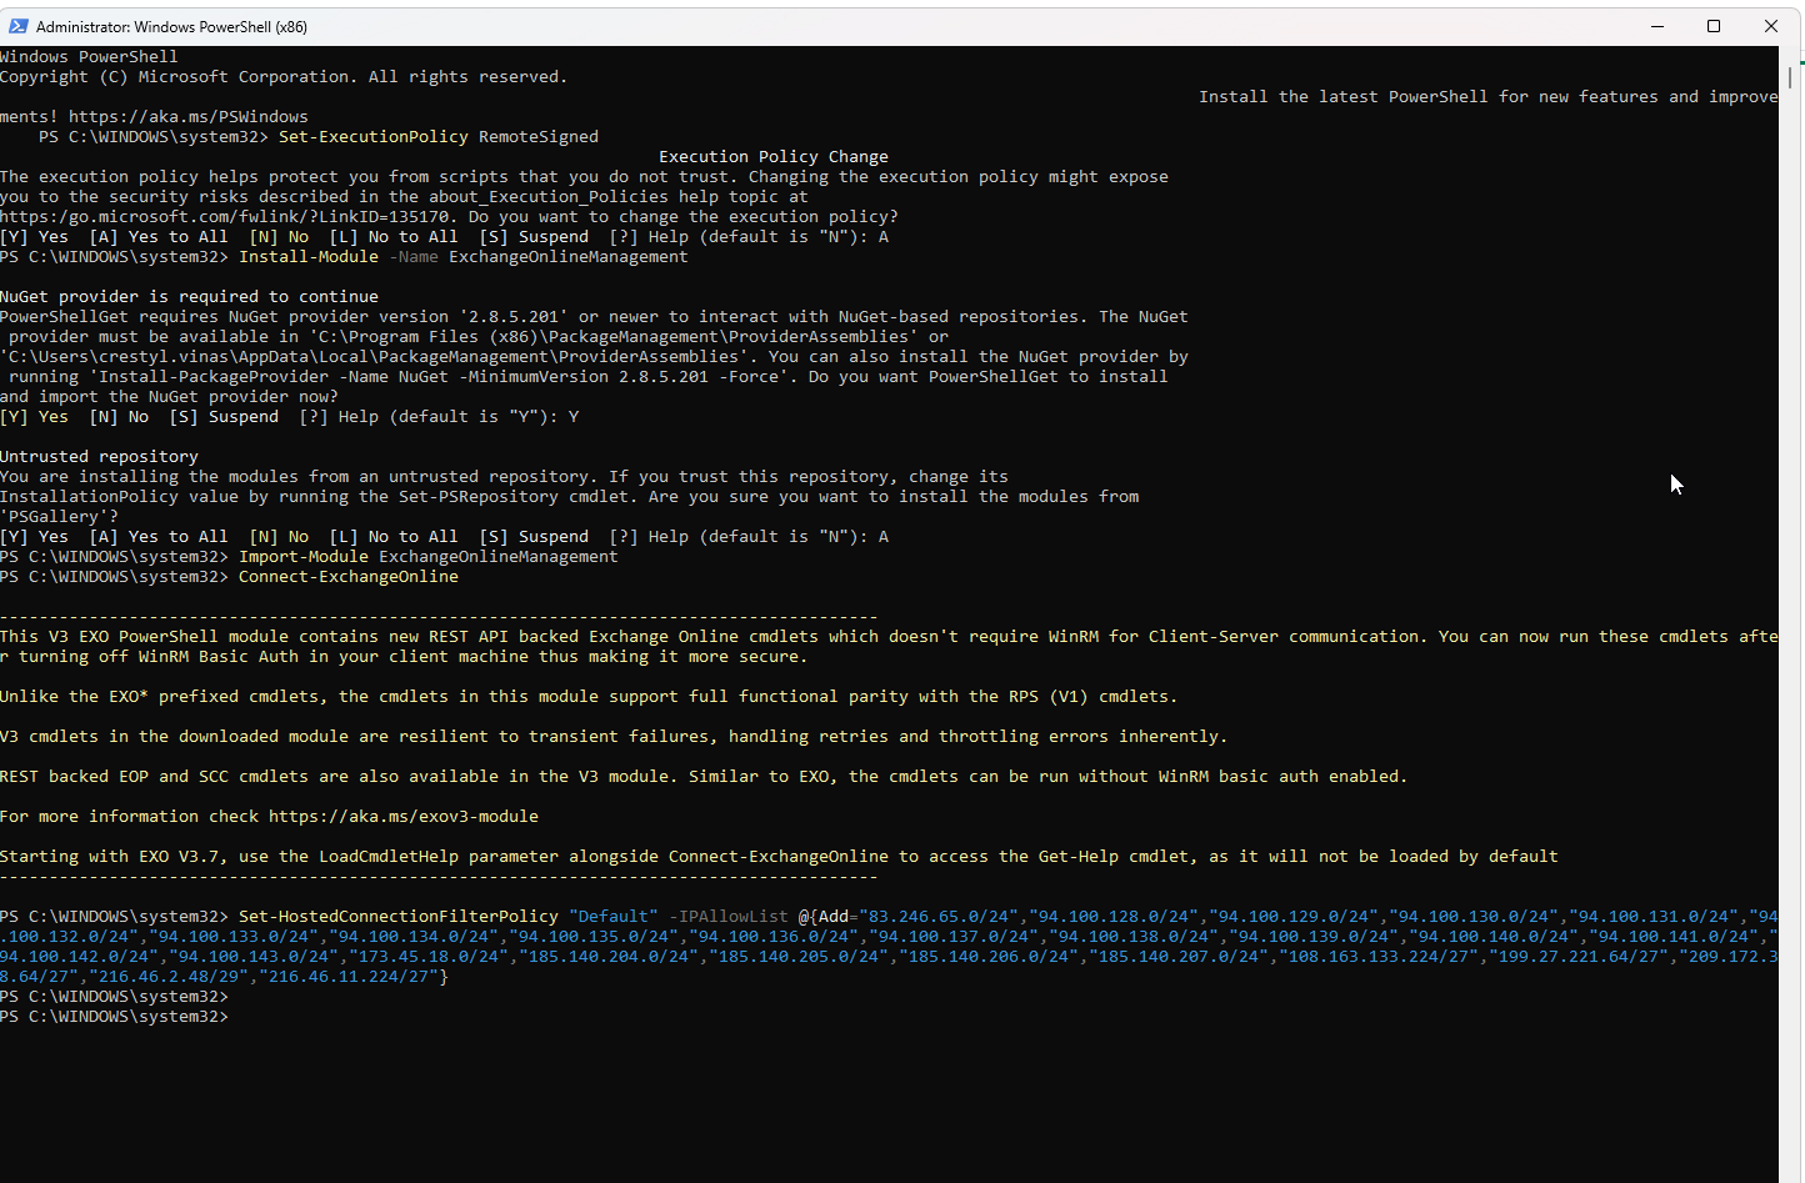
Use Powershell command (Recommended):
[PPTP] Connection Filter for PPTP via Powershell
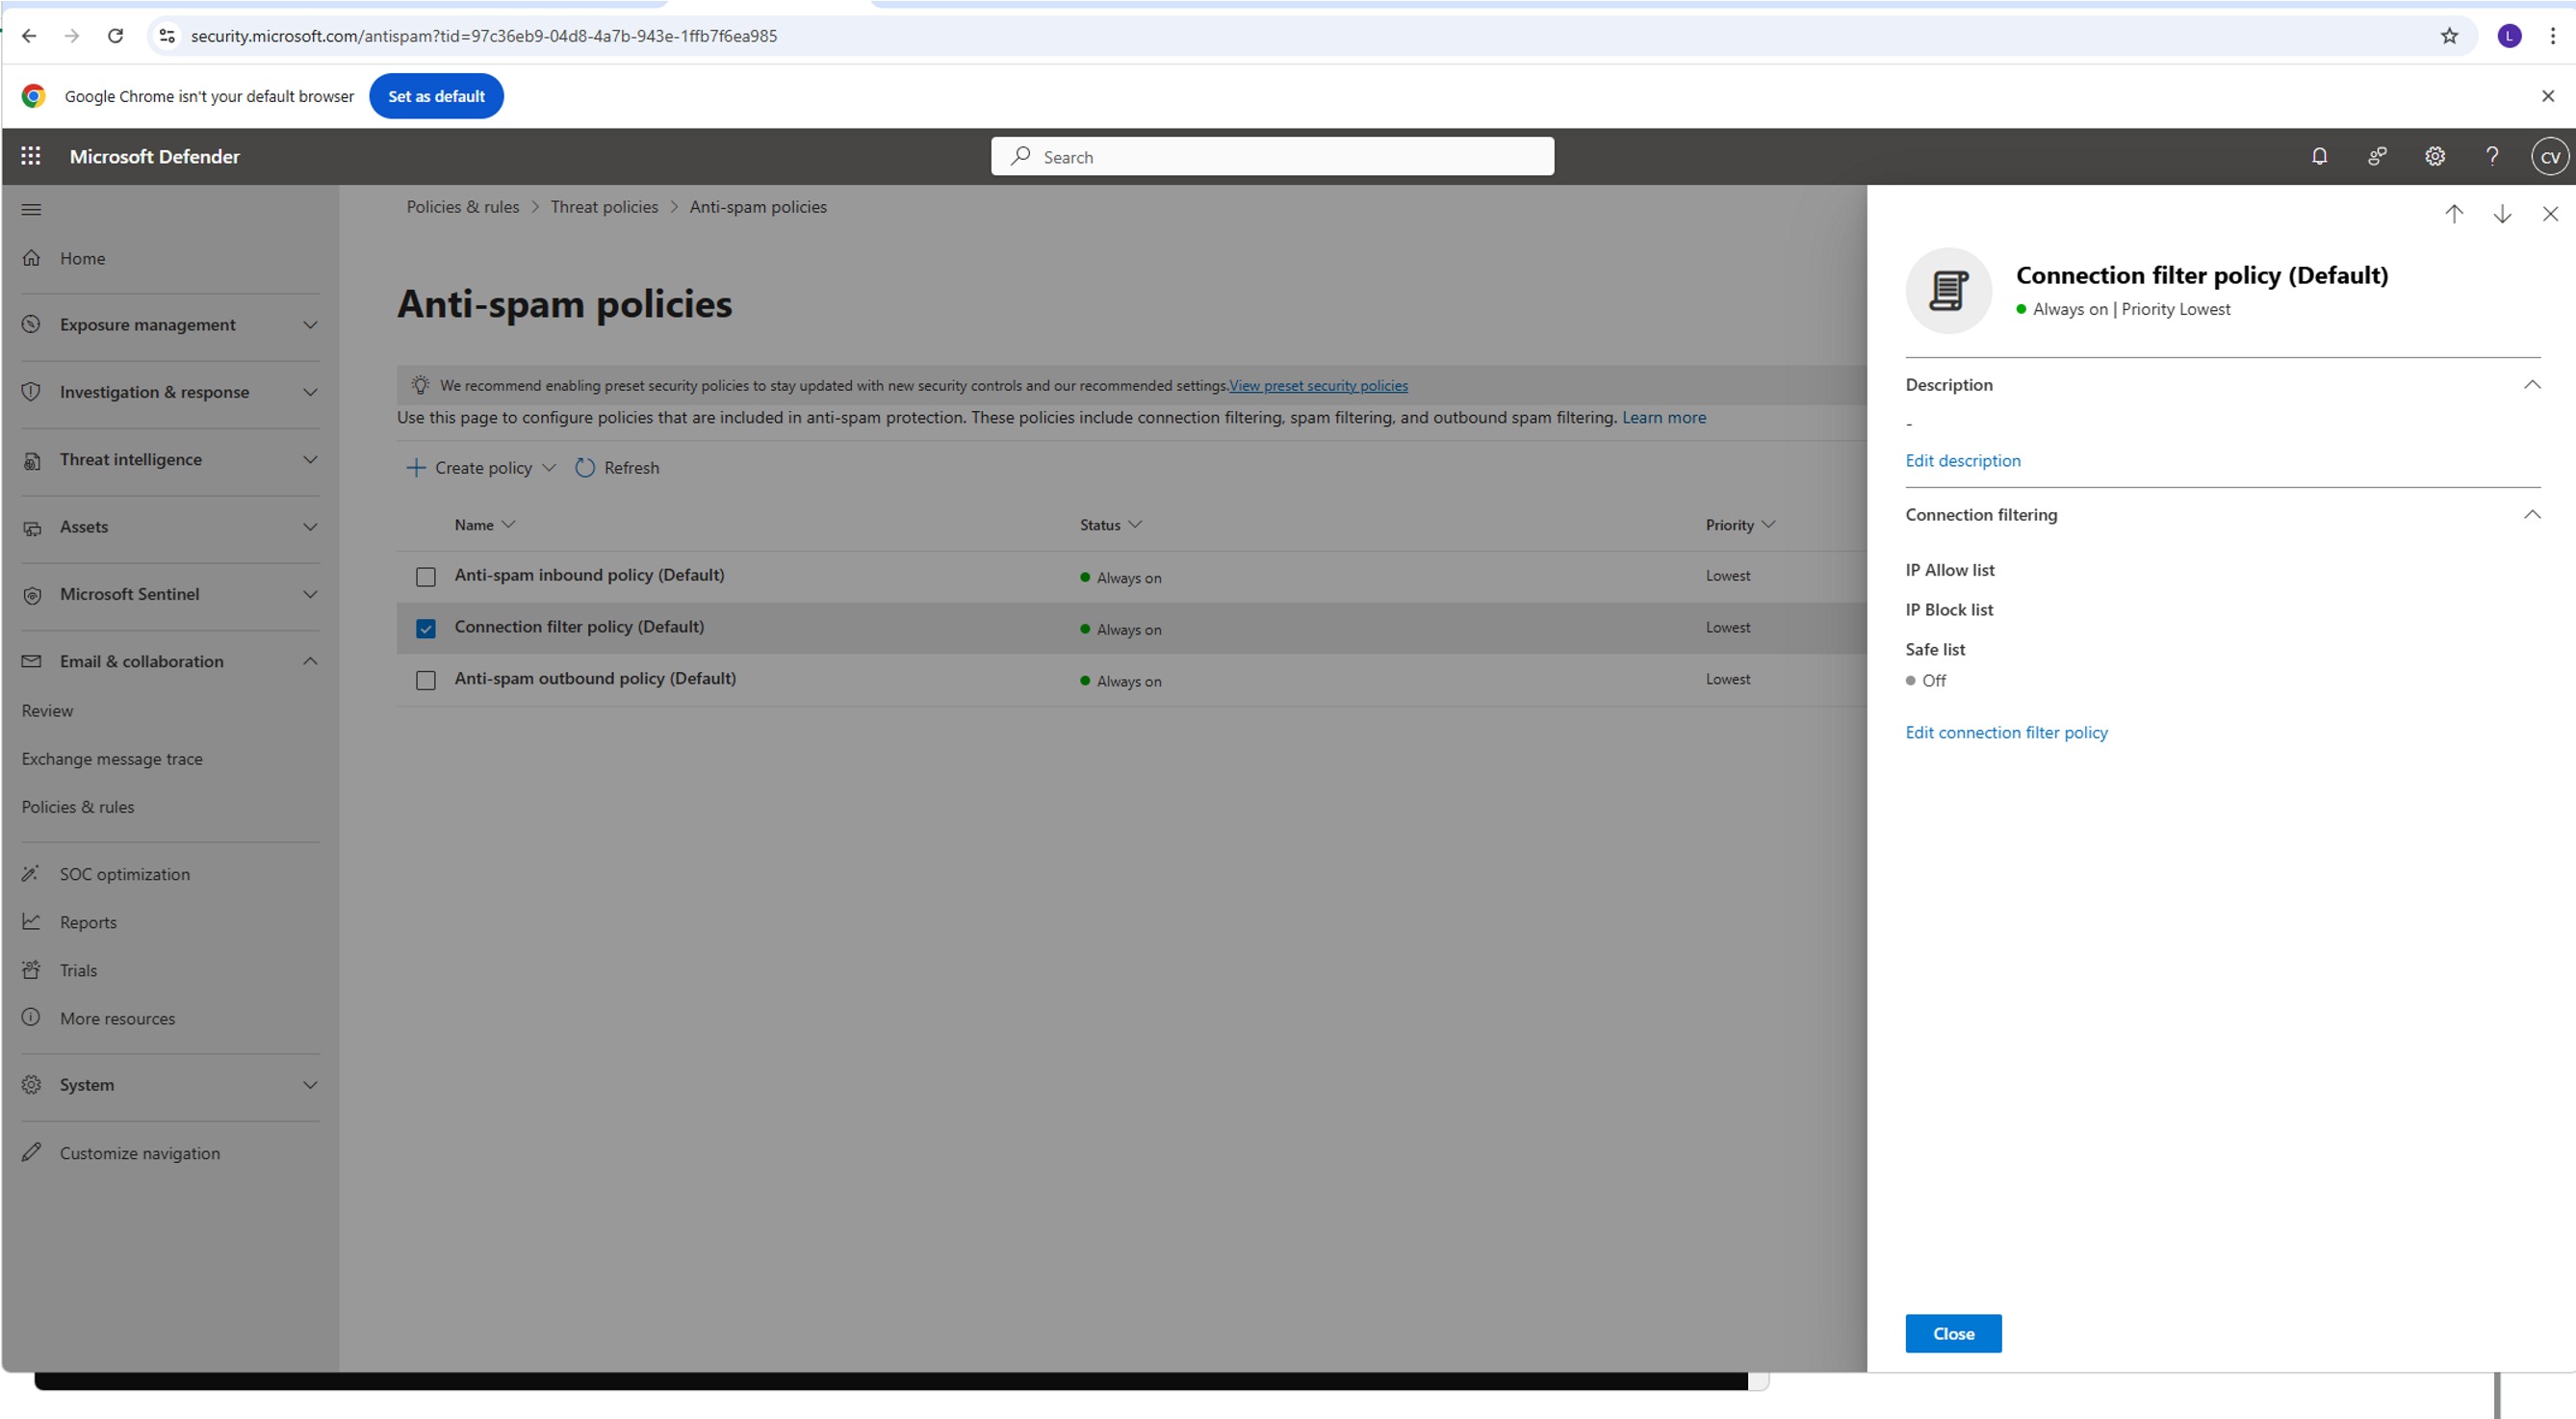
MANUAL STEPS:
Deactivating the Microsoft 365 Spam Filter for the IP Address Range of Hornetsecurity
- Sign in to admin.microsoft.com with an admin account.
- Go to Admin centers → Security.
- Select Policies & rules.
- Click Threat policies.
- Under Policies, select Anti-spam.
- Open Connection filter policy (Default).
- Click Edit connection filter policy.
- Enter the following IP addresses in the input field under Always allow messages from the following IP addresses or address range:
83.246.65.0/24 94.100.128.0/24 94.100.129.0/24
94.100.130.0/24 94.100.131.0/24 94.100.132.0/24
94.100.133.0/24 94.100.134.0/24 94.100.135.0/24
94.100.136.0/24 94.100.137.0/24 94.100.138.0/24
94.100.139.0/24 94.100.140.0/24 94.100.141.0/24
94.100.142.0/24 94.100.143.0/24 173.45.18.0/24
185.140.204.0/24 185.140.205.0/24 185.140.206.0/24
185.140.207.0/24
Customers in Canada must additionally enter the following IP addresses:
108.163.133.224/27 199.27.221.64/27 209.172.38.64/27
216.46.2.48/29 216.46.11.224/27
Save Changes
Adding PPTP MX records (Priority 999) & Domain Verification
PPTP KB Article
https://cp.hornetsecurity.com/manual/index.html#365_total_protection/365-TP-MX-records.html
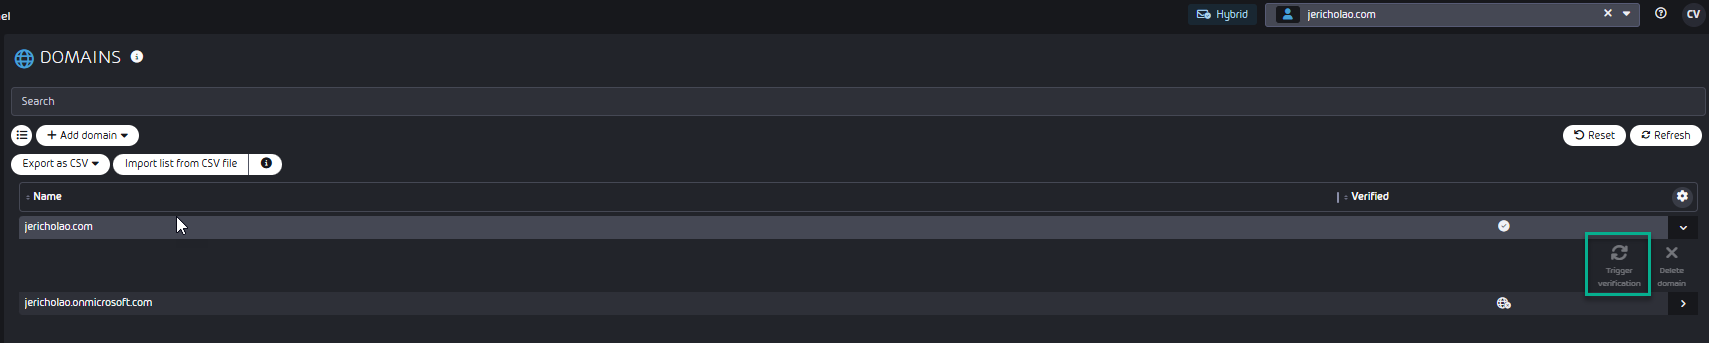
STEPS:
2. Verify the Domain
After adding the PPTP MX records, you can trigger the domain verification from the Control Panel > Settings > Domains.
Depending on the Partner container a domain is in, they will have recommended MX records
 set in Spam & Malware Protection > Settings.
Information on this and the recommended SPF record is here: Onboarding Information North America - Proofpoint Total Protection :

In addition to the recommendation, other possible MX Records that
 include other regions can be found here: Changing the MX Records.
There is no restriction on which can be used, but due to the region of your partner
 container you will find that the "pp-tp.com" records are
 recommended.
Configuring Advanced Threat Protection
This is service that protects against the most advanced and complex cyberattacks carried out via email using a blend of cutting-edge and continually evolving technologies.
PPTP KB Articles:
Activating ATP
Activating Secure Links
Activating AutoRemediate
Activating the Targeted Fraud Forensics Filter

Configuring Email Encryption
PPTP KB Article:
Activating the Targeted Fraud Forensics Filte
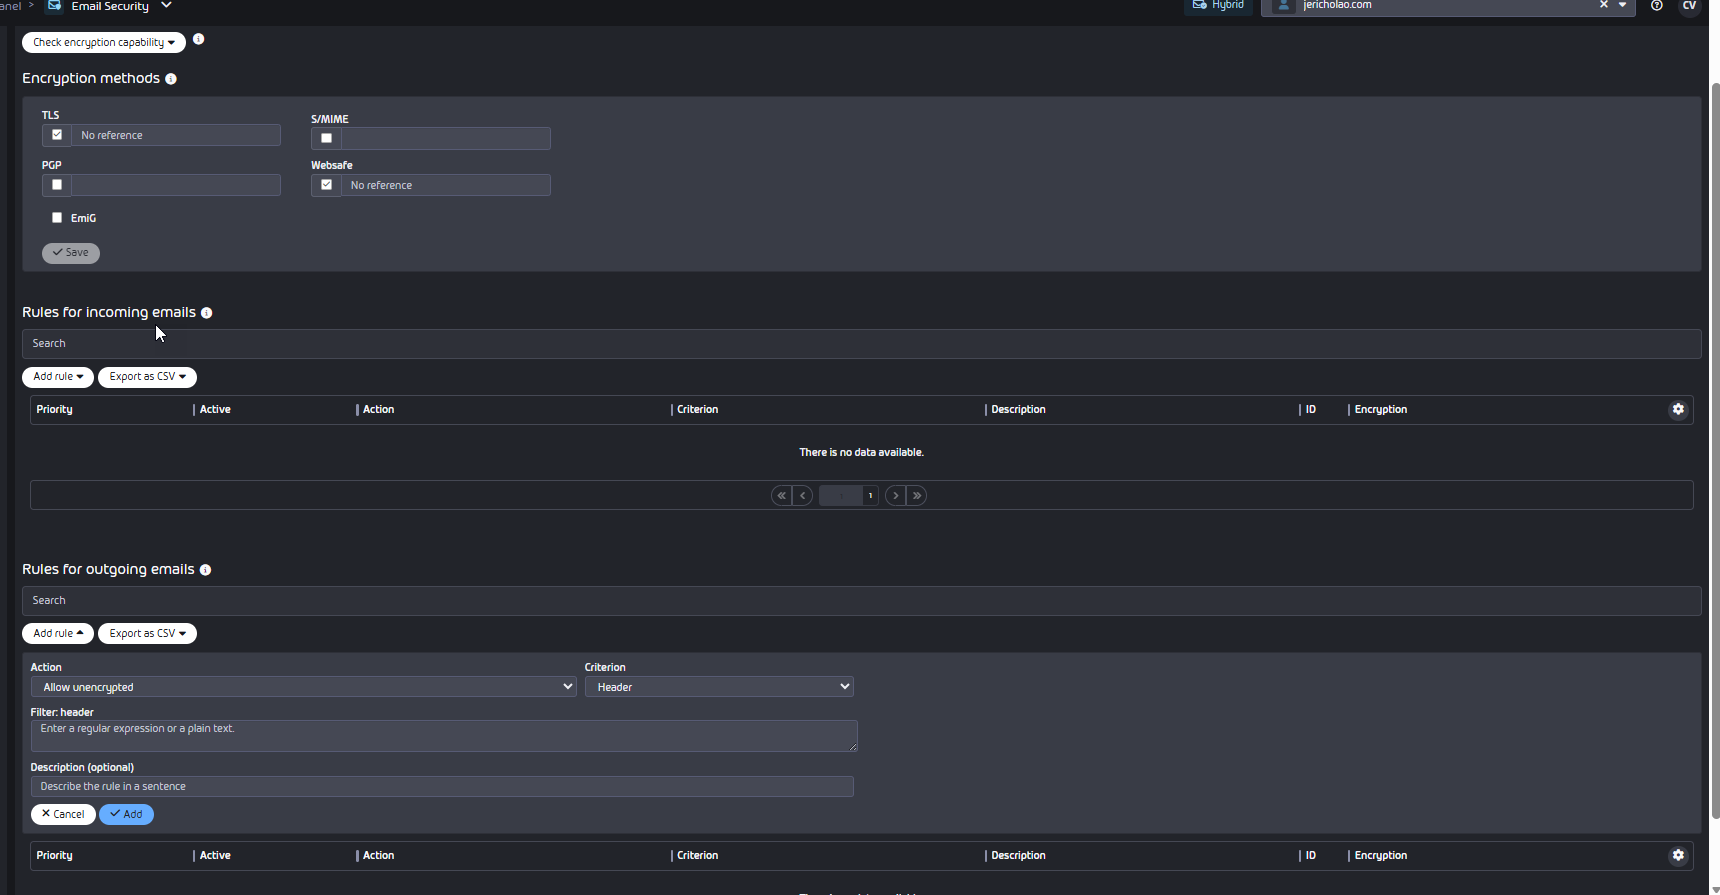
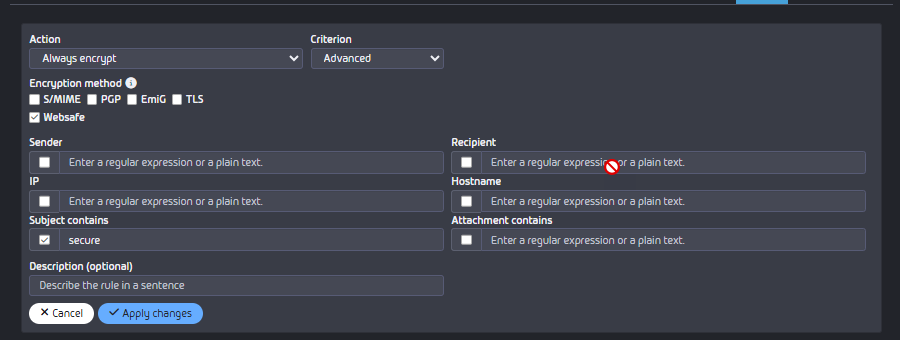
Keywords in the subject of outgoing emails can be used to trigger different actions related to encryption, we recommend avoiding special characters.
Sample encryption rule:
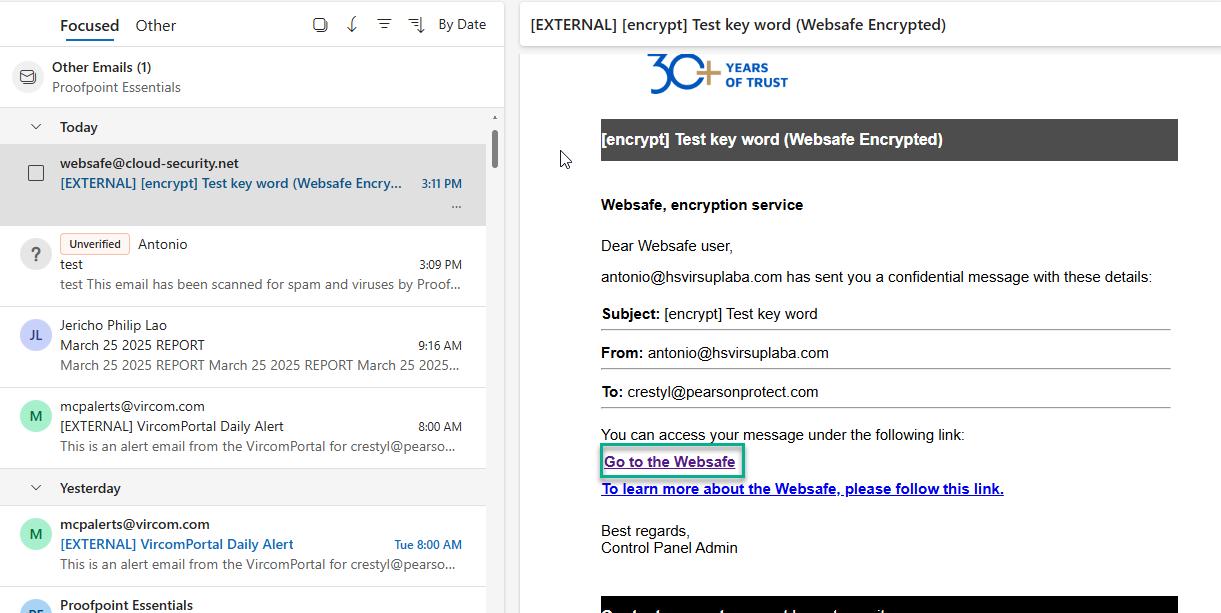
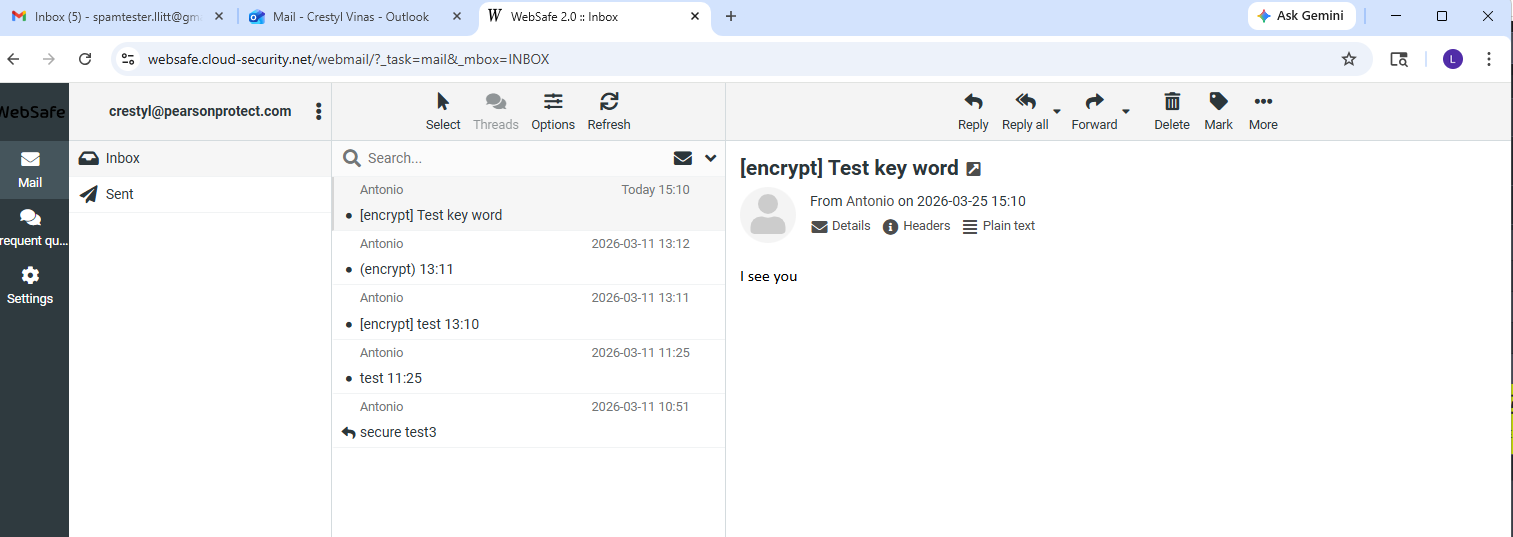
END USER BEHAVIOR:
End users will receive an email from websafe@cloud-security.net.
Enabling Continuity Service
With the Continuity Service, users can continue to receive and send emails if your own email server fails. Once the Continuity Service is configured for a domain or a single user, the Continuity Service is set to be automatically activated when the email server fails.
PPTP KB Article: Activating the Continuity Service

Turning off any Lockdown Rules (previously Set-up)
This action will be performed in Microsoft 365 Exchange Online Admin Center:
Ensure there are no inbound connectors configured that restrict email delivery by sender IP address for your domains.
Changing PPTP MX record (Priority 0) & Inbound Email Verification
IMPORTANT: After configuring Spam & Malware Protection and saving the changes, please wait at least 1 hour for the updates to propagate before proceeding to this step.
STEPS:
- Set the PPTP MX records to the highest priority (Priority 0).
- Verify the inbound mail flow.
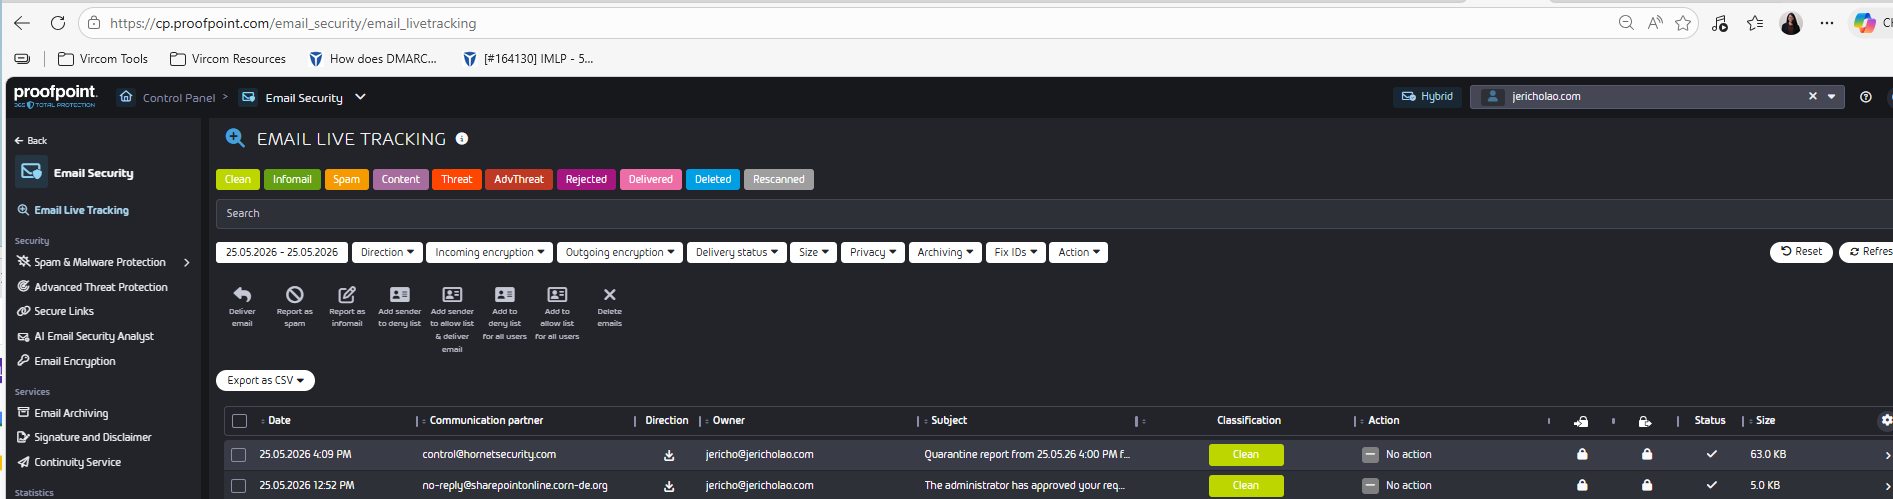
- Confirm that emails are being filtered and delivered successfully by checking Email Live Tracking.
Installing Email connectors
IMPORTANT: Please complete this step only after 24 hours have passed since configuring PPTP MX records to the highest priority (Priority 0).
PPTP KB Article: Configuring Inbound and Outbound Email Traffic Automatically
Inbound and outbound email traffic connectors ensure that all emails from senders and to recipients outside your organization are routed to our servers.
The connectors will be automatically created in the Microsoft Exchange Admin Center under Mail Flow > Connectors.

It is enabled by default.

It will restrict Inbound to only Total Protection IP
 ranges and Relay all Outbound for all domains.
STEPS:
- Log in to the Control Panel with your administrative credentials.
- Select your domain from the scope selection.
- Navigate to Email Security > Spam & Malware Protection > Add-Ins and Connectors.
- Under , click on Install next to Inbound and outbound email connectors.
- Install connectors
- The Microsoft login window opens.
- Log in to Microsoft with your administrative credentials.
- A window with the requested permissions for the installation of connectors is displayed.
- Grant permissions
- Click on Accept.
